
JTL-Wawi is a popular ERP system and Zendesk is a popular customer support platform. But how do you show data from JTL-Wawi (short for the German "Warenwirtschaft" - or ERP) to your agents in Zendesk?
All you need is a FactBranch account and an SQL query. This guide will give you a simple SQL query as a starting point and a template to display the data in Zendesk.
Jump directly to:
First, you need a FactBranch account. If you don't have one already, start your free trial.
After creating an account, you'll be redirected to the list of data pipelines. Select "Show data in the FactBranch Zendesk app" from the list of pipeline templates.
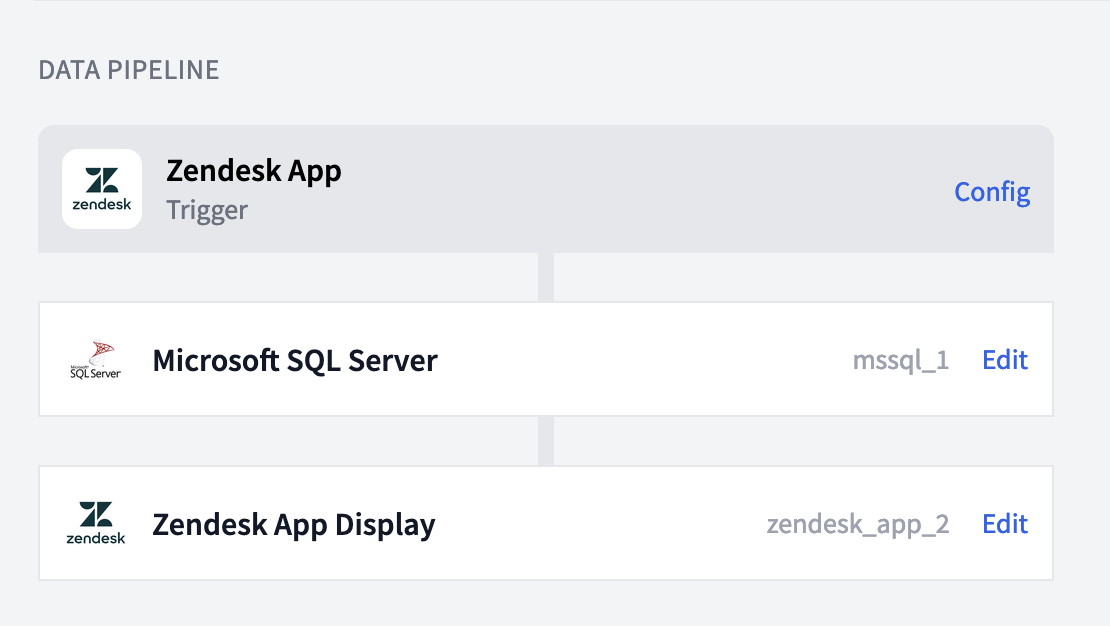
Right now your data pipeline only consists of a trigger and a node. In this case, the Zendesk app triggers the pipeline when a ticket is opened. The only node so far, is the display node, which we'll use later to design the UI that will be shown in Zendesk.
Now we need to add a node that fetches data from your JTL database. Click on the "Create node" button and select "Microsoft SQL Server". It will ask you to connect to your SQL Server database. Click on "Connect to SQL Server now" and enter your database credentials.
We recommend creating a read-only user for FactBranch that only has access to the tables you need.
Once you've connected to your database, you are redirected back to the node and you are ready to add your SQL query.
Writing SQL queries can be tricky. So here is a simple query that fetches the most recent orders for a customer based on their email address or phone number.
I will explain the query step by step. And below you can find the full query. Feel free to adapt this SQL query to your needs. If you need help, do reach out to support@factbranch.com.
The following snippets are all part of one large SQL query. But I've broken it down into smaller parts to explain it better.
With the SQL query we're looking up customers by their email address or phone
number. In JTL email addresses and phone numbers are stored separately from the
customer data. So we need to look up the customer ID based on the email address
or phone number in the tadresse table.
WITH kunde AS (
  SELECT TOP 1 kkunde, kadresse
  FROM tadresse
  WHERE (cMail=$trigger.data.email AND $trigger.data.email IS NOT NULL AND $trigger.data.email <> "") OR (
    $trigger.data.phone_number IS NOT NULL AND $trigger.data.phone_number <> "" AND (
      cTel LIKE '%' + SUBSTRING(ISNULL($trigger.data.phone_number, ''), 4, 250) OR
      cMobil LIKE '%' + SUBSTRING(ISNULL($trigger.data.phone_number, ''), 4, 250)
    )
  )
)
The kunde CTE (Common Table Expression) is a temporary table that we're using
to store the customer ID and the address ID of the customer after looking them
up in the tadresse table. We'll need the customer ID later to fetch the
customer data from the tkunde table.
Note, that we're using placeholders like $trigger.data.email and
$trigger.data.phone_number. These are placeholders that FactBranch will
replace with the actual data when the pipeline is run.
You can copy them from the "Available input data" section in the SQL node.
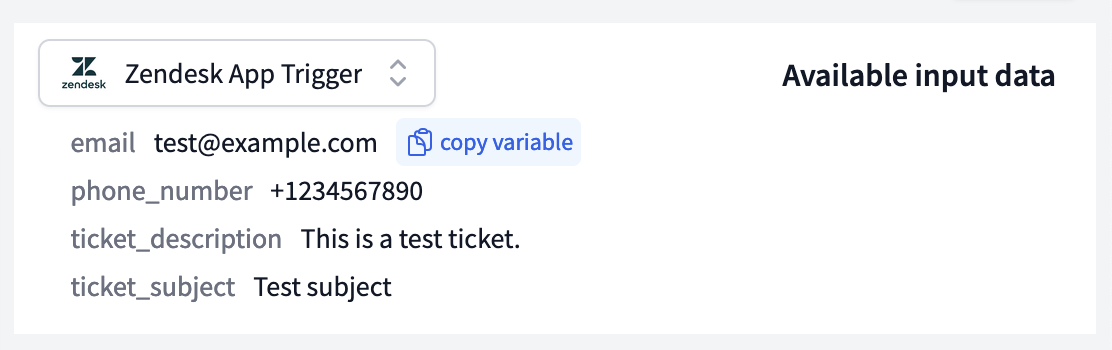 Copy the path of an input data variable in the SQL node
In the next part of the query, we're starting our main SELECT statement and fetch some basic customer data based on the customer ID we found in the previous step.
SELECT
cFirma,cAnrede, cVorname, cName, cPLZ, cOrt, cLand, cMail, cTel, cMobil,
FORMAT(tkunde.dErstellt, 'd', 'de-de' ) AS kunde_seit,
Then we're fetching the number of orders and the total revenue of the customer
by joining the tBestellung and tbestellpos tables. We're using the customer
ID from the kunde CTE to filter the orders and revenue for this customer.
(
  SELECT COUNT(tBestellung.kbestellung) FROM tBestellung
  WHERE tBestellung.tkunde_kkunde = (SELECT kkunde FROM kunde)
) AS anzahl_auftraege,
Now we're fetching the total revenue of the customer. We're using the FORMAT
function to format the number as a currency with two decimal places. We have to
join the tbestellpos table to fetch the revenue of each order and then sum
them up.
(
  SELECT FORMAT(ROUND(SUM(fVKPreis), 2), "0.00") FROM tBestellung
  LEFT JOIN tbestellpos
    ON tbestellpos.tbestellung_kbestellung = tBestellung.kBestellung
  WHERE tBestellung.tkunde_kkunde = (SELECT kkunde FROM kunde)
) AS umsatz,
In the next part of the query, we're fetching the five most recent orders of the
customer. We're using the FOR JSON PATH clause to format the result as a JSON
array. This JSON array will be used later in the Zendesk UI to display a collapsible
box for each order.
(
  SELECT TOP 5
    MIN(cBestellNr) AS bestell_nr,
    FORMAT(MIN(dErstellt), 'd', 'de-de' ) AS erstellt_str,
    ROUND(SUM(fVKPreis), 2) AS summe,
    MIN(cStatus) AS status_str
  FROM tBestellung

  LEFT JOIN tbestellpos
    ON tbestellpos.tbestellung_kbestellung = tBestellung.kBestellung
  WHERE tBestellung.tkunde_kkunde = (SELECT kkunde FROM kunde)
  GROUP BY tbestellung.kbestellung
  ORDER BY MIN(dErstellt) DESC
  FOR JSON PATH
) AS letzte_auftraege
Finally, we're joining the tadresse and tkunde tables to fetch the customer
data based on the address ID we found in the kunde CTE.
FROM tadresse
LEFT JOIN tkunde ON tkunde.kKunde=tadresse.kKunde
WHERE tadresse.kadresse = (SELECT kadresse FROM kunde)
Finally, here is the full SQL query that you can copy and paste into the SQL editor in the FactBranch node. Use this code as a starting point and adapt it to your needs.
To try out the query, click on the "Run" button in the SQL node. If you get an error, double-check the SQL query and the placeholders. If you're happy with the results, you can move on to the next node and design the UI.
WITH kunde AS (
  SELECT TOP 1 kkunde, kadresse
  FROM tadresse
  WHERE (cMail=$trigger.data.email AND $trigger.data.email IS NOT NULL AND $trigger.data.email <> "") OR (
    $trigger.data.phone_number IS NOT NULL AND $trigger.data.phone_number <> "" AND (
      cTel LIKE '%' + SUBSTRING(ISNULL($trigger.data.phone_number, ''), 4, 250) OR
      cMobil LIKE '%' + SUBSTRING(ISNULL($trigger.data.phone_number, ''), 4, 250)
    )
  )
)

SELECT
cFirma,cAnrede, cVorname, cName, cPLZ, cOrt, cLand, cMail, cTel, cMobil,
FORMAT(tkunde.dErstellt, 'd', 'de-de' ) AS kunde_seit,
(
  SELECT COUNT(tBestellung.kbestellung) FROM tBestellung
  WHERE tBestellung.tkunde_kkunde = (SELECT kkunde FROM kunde)
) AS anzahl_auftraege,
(
  SELECT FORMAT(ROUND(SUM(fVKPreis), 2), "0.00") FROM tBestellung
  LEFT JOIN tbestellpos
    ON tbestellpos.tbestellung_kbestellung = tBestellung.kBestellung
  WHERE tBestellung.tkunde_kkunde = (SELECT kkunde FROM kunde)
) AS umsatz,
(
  SELECT TOP 5
    MIN(cBestellNr) AS bestell_nr,
    FORMAT(MIN(dErstellt), 'd', 'de-de' ) AS erstellt_str,
    ROUND(SUM(fVKPreis), 2) AS summe,
    MIN(cStatus) AS status_str

  FROM tBestellung
  LEFT JOIN tbestellpos
    ON tbestellpos.tbestellung_kbestellung = tBestellung.kBestellung
  WHERE tBestellung.tkunde_kkunde = (SELECT kkunde FROM kunde)
  GROUP BY tbestellung.kbestellung
  ORDER BY MIN(dErstellt) DESC
  FOR JSON PATH
) AS letzte_auftraege

FROM tadresse
LEFT JOIN tkunde ON tkunde.kKunde=tadresse.kKunde
WHERE tadresse.kadresse = (SELECT kadresse FROM kunde)
Once you're happy with the SQL query and the results, you can move on to the "Zendesk App Display" node. This node is used to design the UI that will be shown in Zendesk.
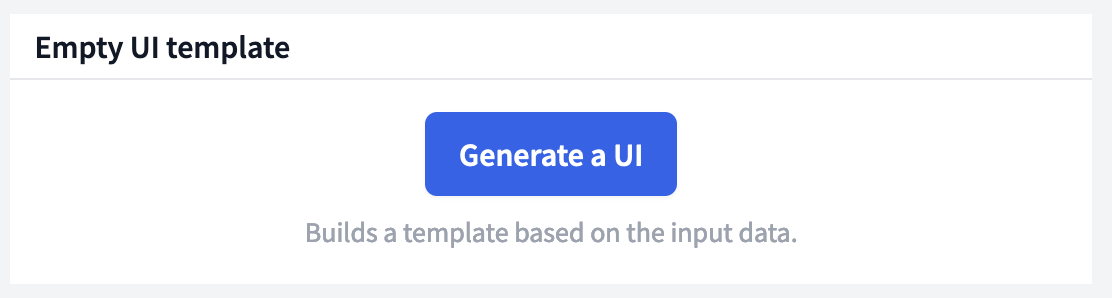
First, click on "Generate a UI" to let FactBranch figure out how to display the data. Then we'll edit the HTML to add a table that show the most recent orders of the customer. You can use HTML and CSS to design the UI as you like.
FactBranch uses the Jinja2 templating engine to render the HTML. It's similar to Liquid, which is used in Zendesk and Shopify. You can use variables like `` to insert results from the SQL query into the HTML.
Now let's replace the generated HTML for 'letzte_auftraege' with a table that shows the most recent orders of the customer. Here is an example of how you can do that.
Delete the following HTML snippet in the "Zendesk App Display":
  <div class="c_fbzd_item">
    <div class="c_fbzd_item__label">Letzte auftraege</div>
    <div class="c_fbzd_item__value">{{ row["letzte_auftraege"] }}</div>
  </div>
And replace it with the following HTML snippet:
<div style="padding: 10px;">
  <h3>Letzte Bestellungen</h3>
  {% set results = row["letzte_auftraege"]|json %}
  {% if results %}
  <div style="overflow-x: auto;">
    <table style="width: 100%; border-collapse: collapse;">
      <thead>
        <tr>
          <th style="border: 1px solid black; padding: 5px;">Bestell-Nr.</th>
          <th style="border: 1px solid black; padding: 5px;">Bestelldatum</th>
          <th style="border: 1px solid black; padding: 5px;">Summe</th>
          <th style="border: 1px solid black; padding: 5px;">Status</th>
        </tr>
      </thead>
      <tbody>
        {% for item in results %}
          <tr>
            <td style="border: 1px solid black; padding: 5px;">{{ item.bestell_nr }}</td>
            <td style="border: 1px solid black; padding: 5px;">{{ item.erstellt_str }}</td>
            <td style="border: 1px solid black; padding: 5px; text-align: right;">{{ item.summe }}</td>
            <td style="border: 1px solid black; padding: 5px;">{{ item.status_str }}</td>
          </tr>
        {% endfor %}
      </tbody>
    </table>
  </div>
  {% else %}
    <p style="color: gray">Kunde hat keine Bestellungen</p>
  {% endif %}
</div>
This HTML snippet will create a table that shows the most recent orders of the customer. If the customer has no orders, it will show a message that the customer has no orders.
It does all this by first converting the JSON string that we fetched in the SQL
query to an array of objects. This is done with the |json filter.
Then it loops over the array and creates a table row for each order.
Now you're ready to install the FactBranch Zendesk app. Return to the data pipeline and click on "Config" in the Zendesk trigger box.
On that page you'll find links to the various FactBranch Zendesk apps in the Zendesk App Marketplace and detailed instructions on how to install them.
Once you've installed the app, you can test the pipeline by opening a ticket in Zendesk. You should see the data from JTL-Wawi displayed in the Zendesk sidebar.
If you have any questions or need help, do reach out to our support at support@factbranch.com.
Our comprehensive guide looks at the 14 best Zendesk apps for integrating external customer data. Enhance your customer service experience by installi...
Discover how constant tab-switching in customer support steals valuable time and focus. Explore solutions like integrating data and using larger scree...
Learn practical strategies for reducing customer support resolution time in Zendesk. Explore creating a knowledge base, integrating external data, and...
What are Key Performance Indicators that really improve your customer service? We look at the five most important KPIs First Response Time, Time To Re...
Sign up for our newsletter to get our freshest insights and product updates.
We care about the protection of your data. Read our Privacy Policy.