REST API data in Zendesk
Call any REST API from Zendesk tickets and show the response in the sidebar, live on every ticket open. No code, no glue backend, no sync.
Most customer systems of record expose a REST API: your own product, your billing provider, your shipping provider, your internal services. Support teams usually need data from one of those APIs to answer tickets — but making API calls from inside Zendesk traditionally means building a custom app or a middleware backend. Most teams skip it and just tab-switch instead, copying emails and order IDs across a few open tabs until they find the answer.
Ready to show REST API data in your Zendesk tickets?
14-day free trial · No credit card required · Live in 10 minutes
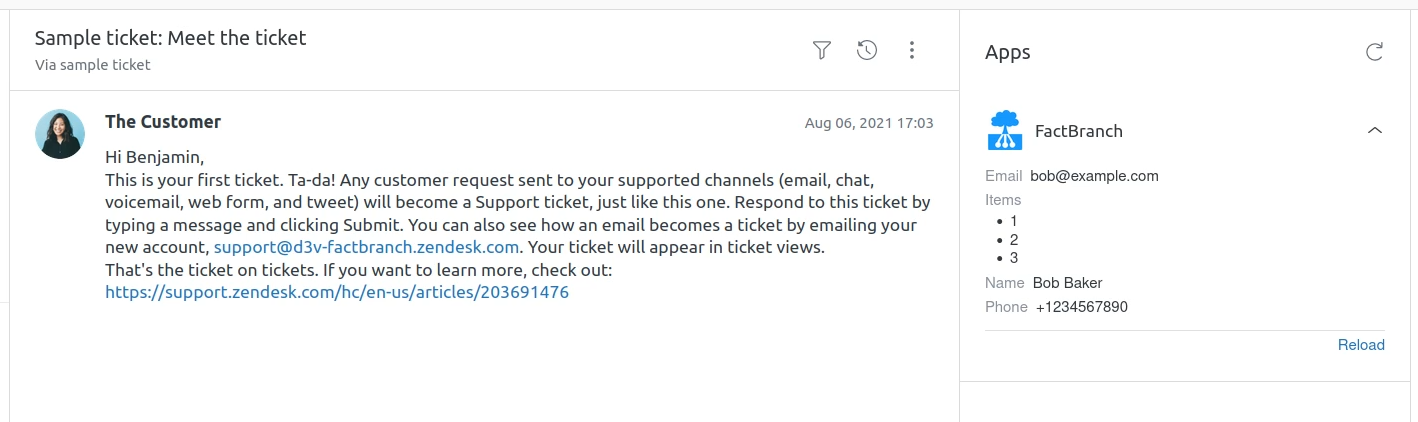
FactBranch is the glue that removes that cost. It calls your API live every time a Zendesk ticket is opened, passes the ticket context as parameters, and renders the response as a panel inside the ticket sidebar. No code, no backend to maintain.
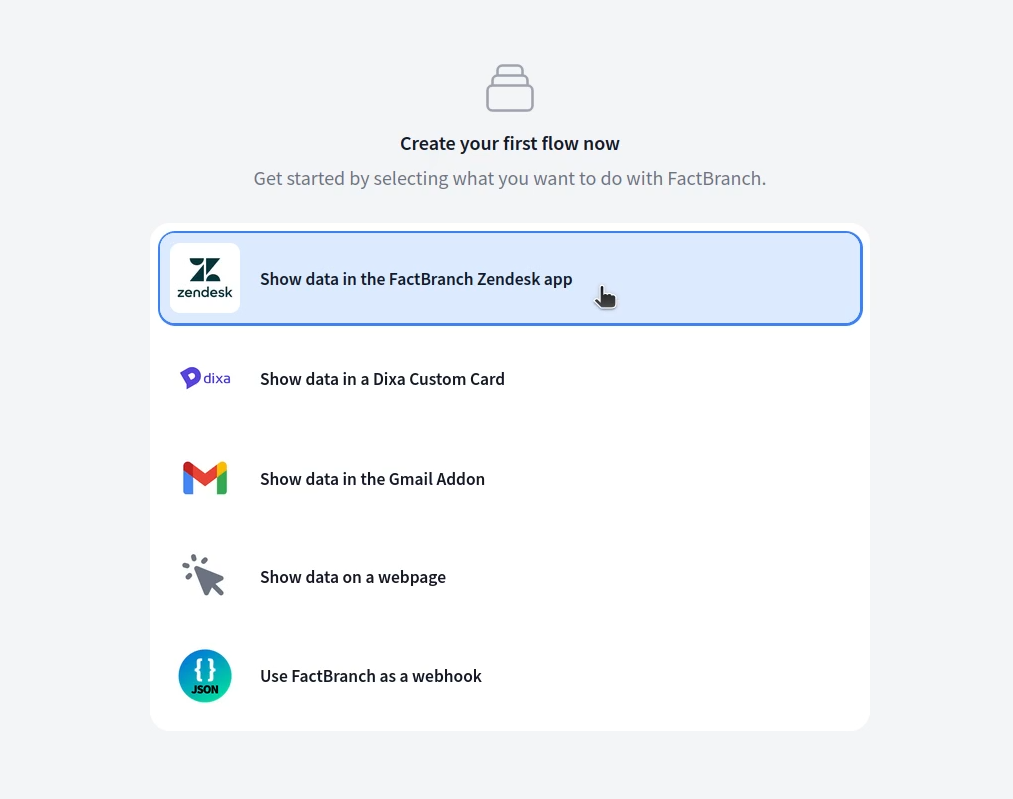
How it works
FactBranch is a visual pipeline builder, not an ETL tool. There's no intermediate data store, no sync schedule to tune. The flow is simple: the Zendesk app passes the ticket context (requester email, ticket ID, organization, and anything else you want) to FactBranch. FactBranch makes an HTTP request to your API — with ticket context interpolated into the URL, headers, query parameters, or body — and renders the JSON response as an HTML panel in the Zendesk sidebar.
Each step is a node in the visual editor. You configure one API request and one HTML template. Everything else — the Zendesk integration, the authentication, the parameter passing, the JSON parsing, the rendering — FactBranch handles.
Configuring the request
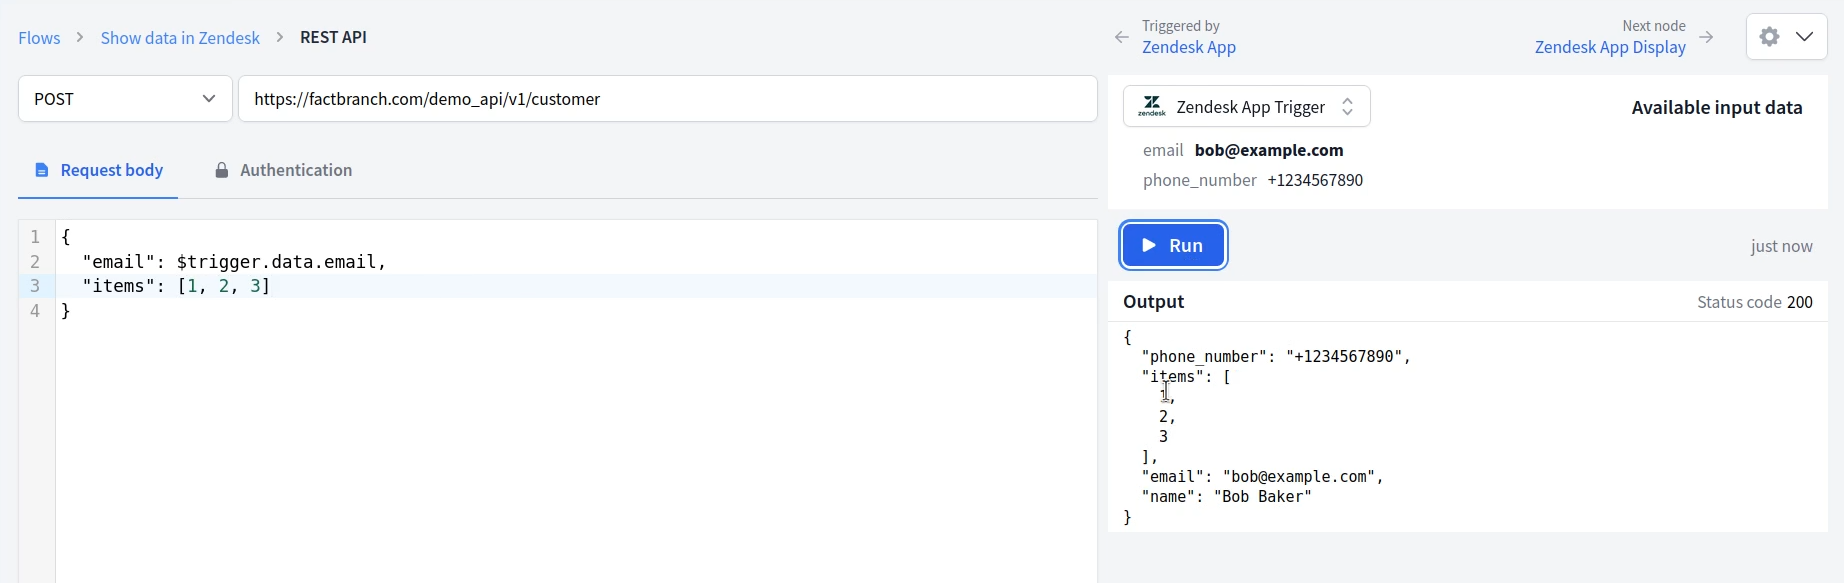
You configure the HTTP request much like you would in a tool like Postman:
method, URL, headers, query parameters, body. Ticket context is available as
variables you can interpolate into any of those pieces, so you can hit
/customers?email=..., /orders/{ticket_id}, or any other pattern your API
supports. Run the request from the editor to see the exact JSON response
before you wire it up to the sidebar.
FactBranch handles most authentication patterns out of the box: API keys in headers, Bearer tokens, basic auth, and OAuth with automatic token refresh. For APIs that return paginated results, you can loop through pages and merge the data. For APIs that need multiple calls (look up a customer, then their orders), you can chain nodes so one request's output is the next one's input.
Designing the sidebar UI
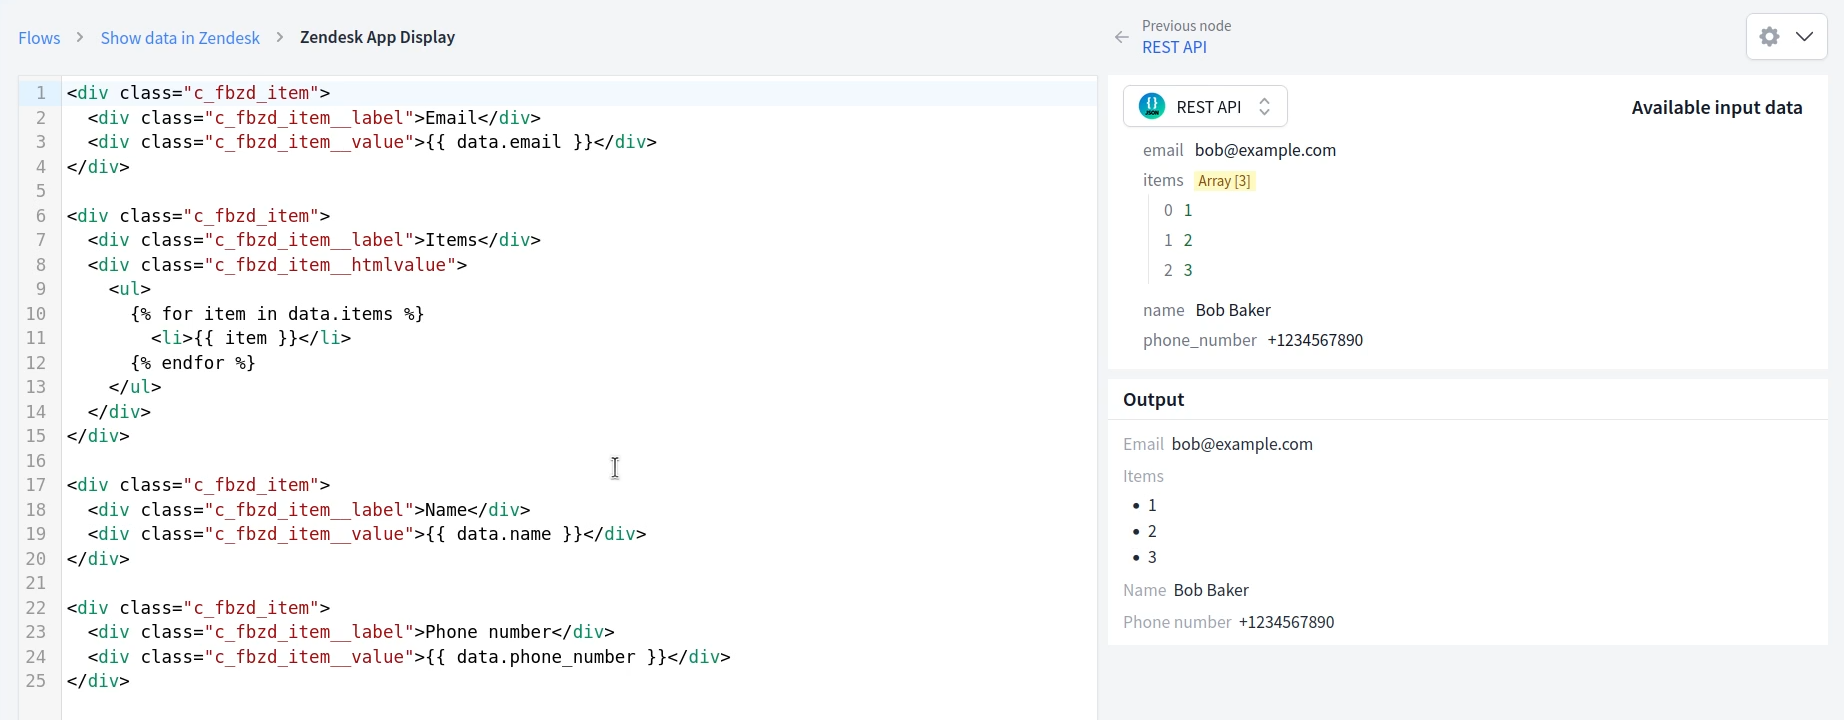
Once you have the JSON response, FactBranch pipes it into a display node where you design the Zendesk panel. There's a "Generate a UI" button that produces a working HTML template from the shape of your response — a sensible starting point you can then edit. You can tweak the template directly, add conditionals for missing fields, style it with CSS, and loop over arrays in the response. The templating language is Jinja2-compatible.
Keeping it safe
Your API stays where it is. FactBranch calls it from the server side — credentials never leave our backend, and your API surface isn't exposed to the browser. We recommend creating a dedicated API credential for FactBranch with the minimum scope it needs. If your API is behind an IP allowlist, FactBranch can route requests through a static IP so you can safely include us.
Credentials are stored encrypted. We don't cache API responses by default, so every ticket gets a fresh call; there's no stale data to worry about.
Setup
Most teams are live in about 10 minutes. Create a free FactBranch account, add a REST API connection with the right auth scheme, configure the request using ticket context variables, and design the panel in the display node. The final step is installing the FactBranch app from the Zendesk marketplace and pasting in your API key — agents see the sidebar on the next ticket they open.
See the full walkthrough in our REST API documentation or watch a support agent use the sidebar in practice.
Ready to show REST API data in your Zendesk tickets?
14-day free trial · No credit card required · Live in 10 minutes