Support teams live in their ticketing system. But the data you need to resolve issues - customer status, plan details, internal IDs, admin links - often lives somewhere else, like Snowflake. The good news: you don’t have to keep hopping between tools.
In this guide, I’ll walk through a simple setup that pulls customer data from Snowflake and displays it directly in the FreshService ticket sidebar using FactBranch - so the right context is always only one click away.
Here is everything we'll talk about in the article:
After you’ve created a FactBranch account, the first move is to start a pipeline designed specifically for the Freshworks app experience. This pipeline is triggered from within FreshService, which is exactly what we want: open a ticket, and the data fetch happens automatically.
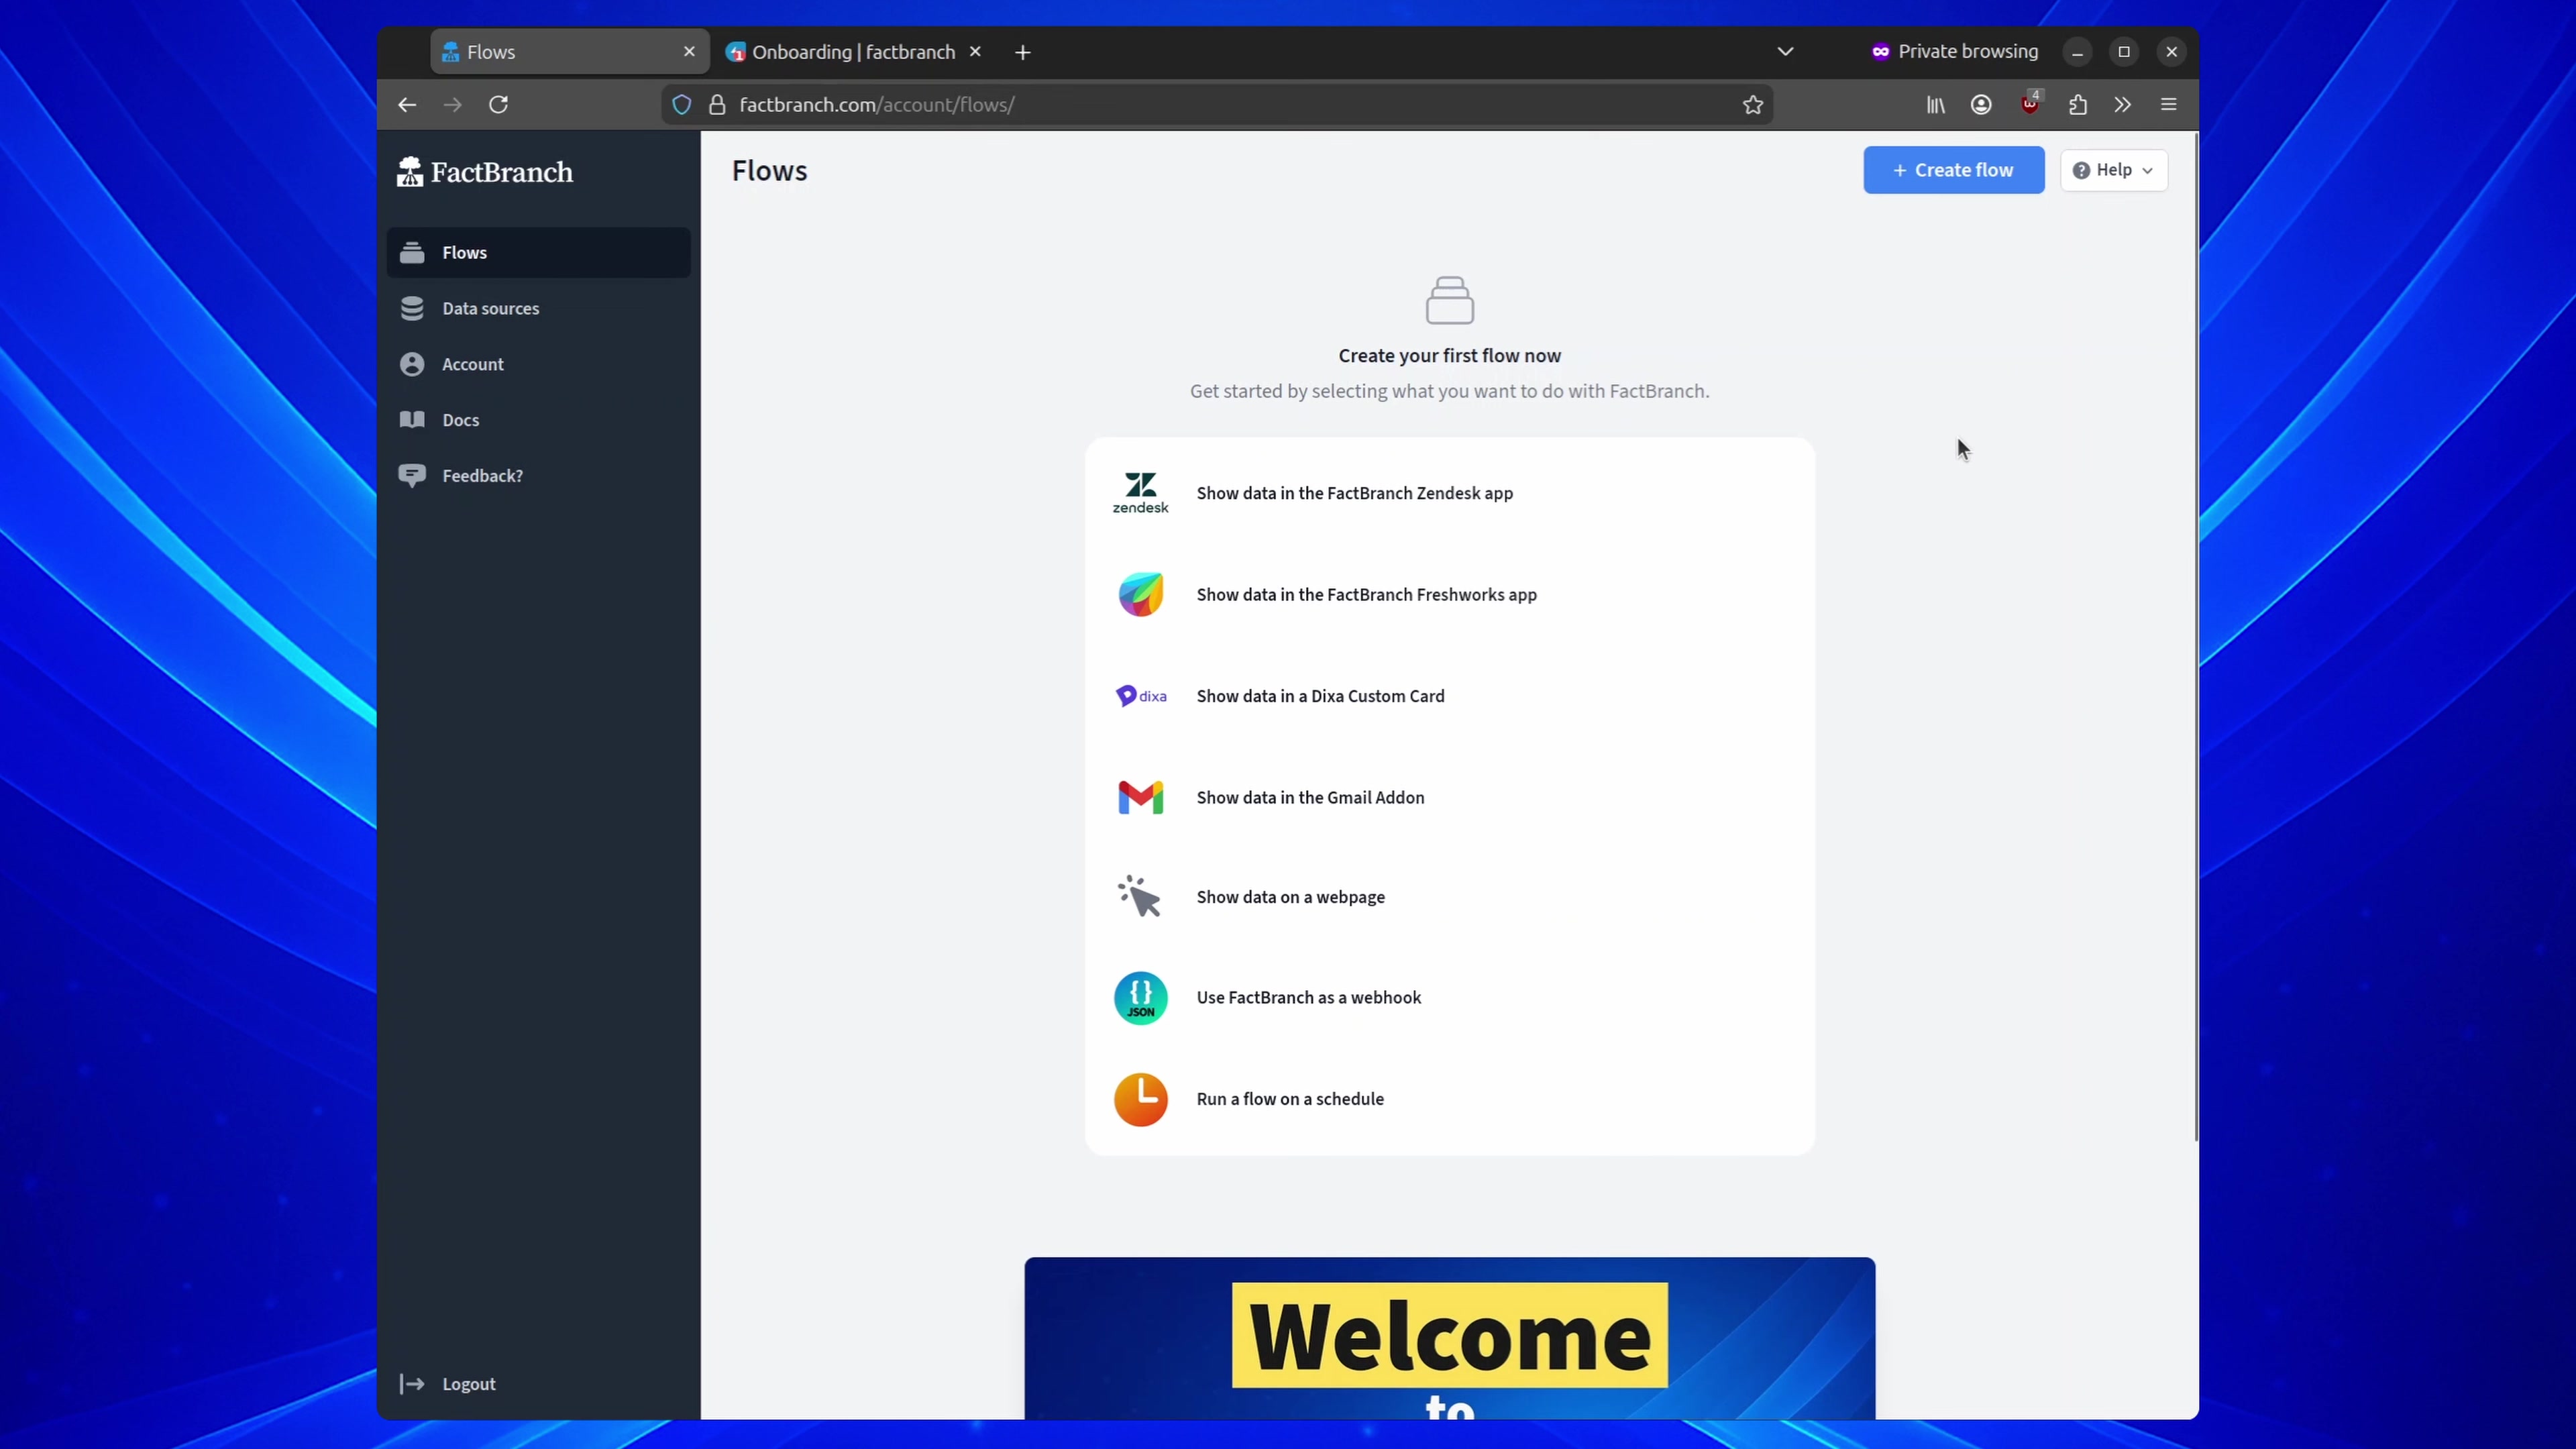
With that option selected, FactBranch generates a pipeline scaffold that’s already wired to work with the Freshworks app trigger.
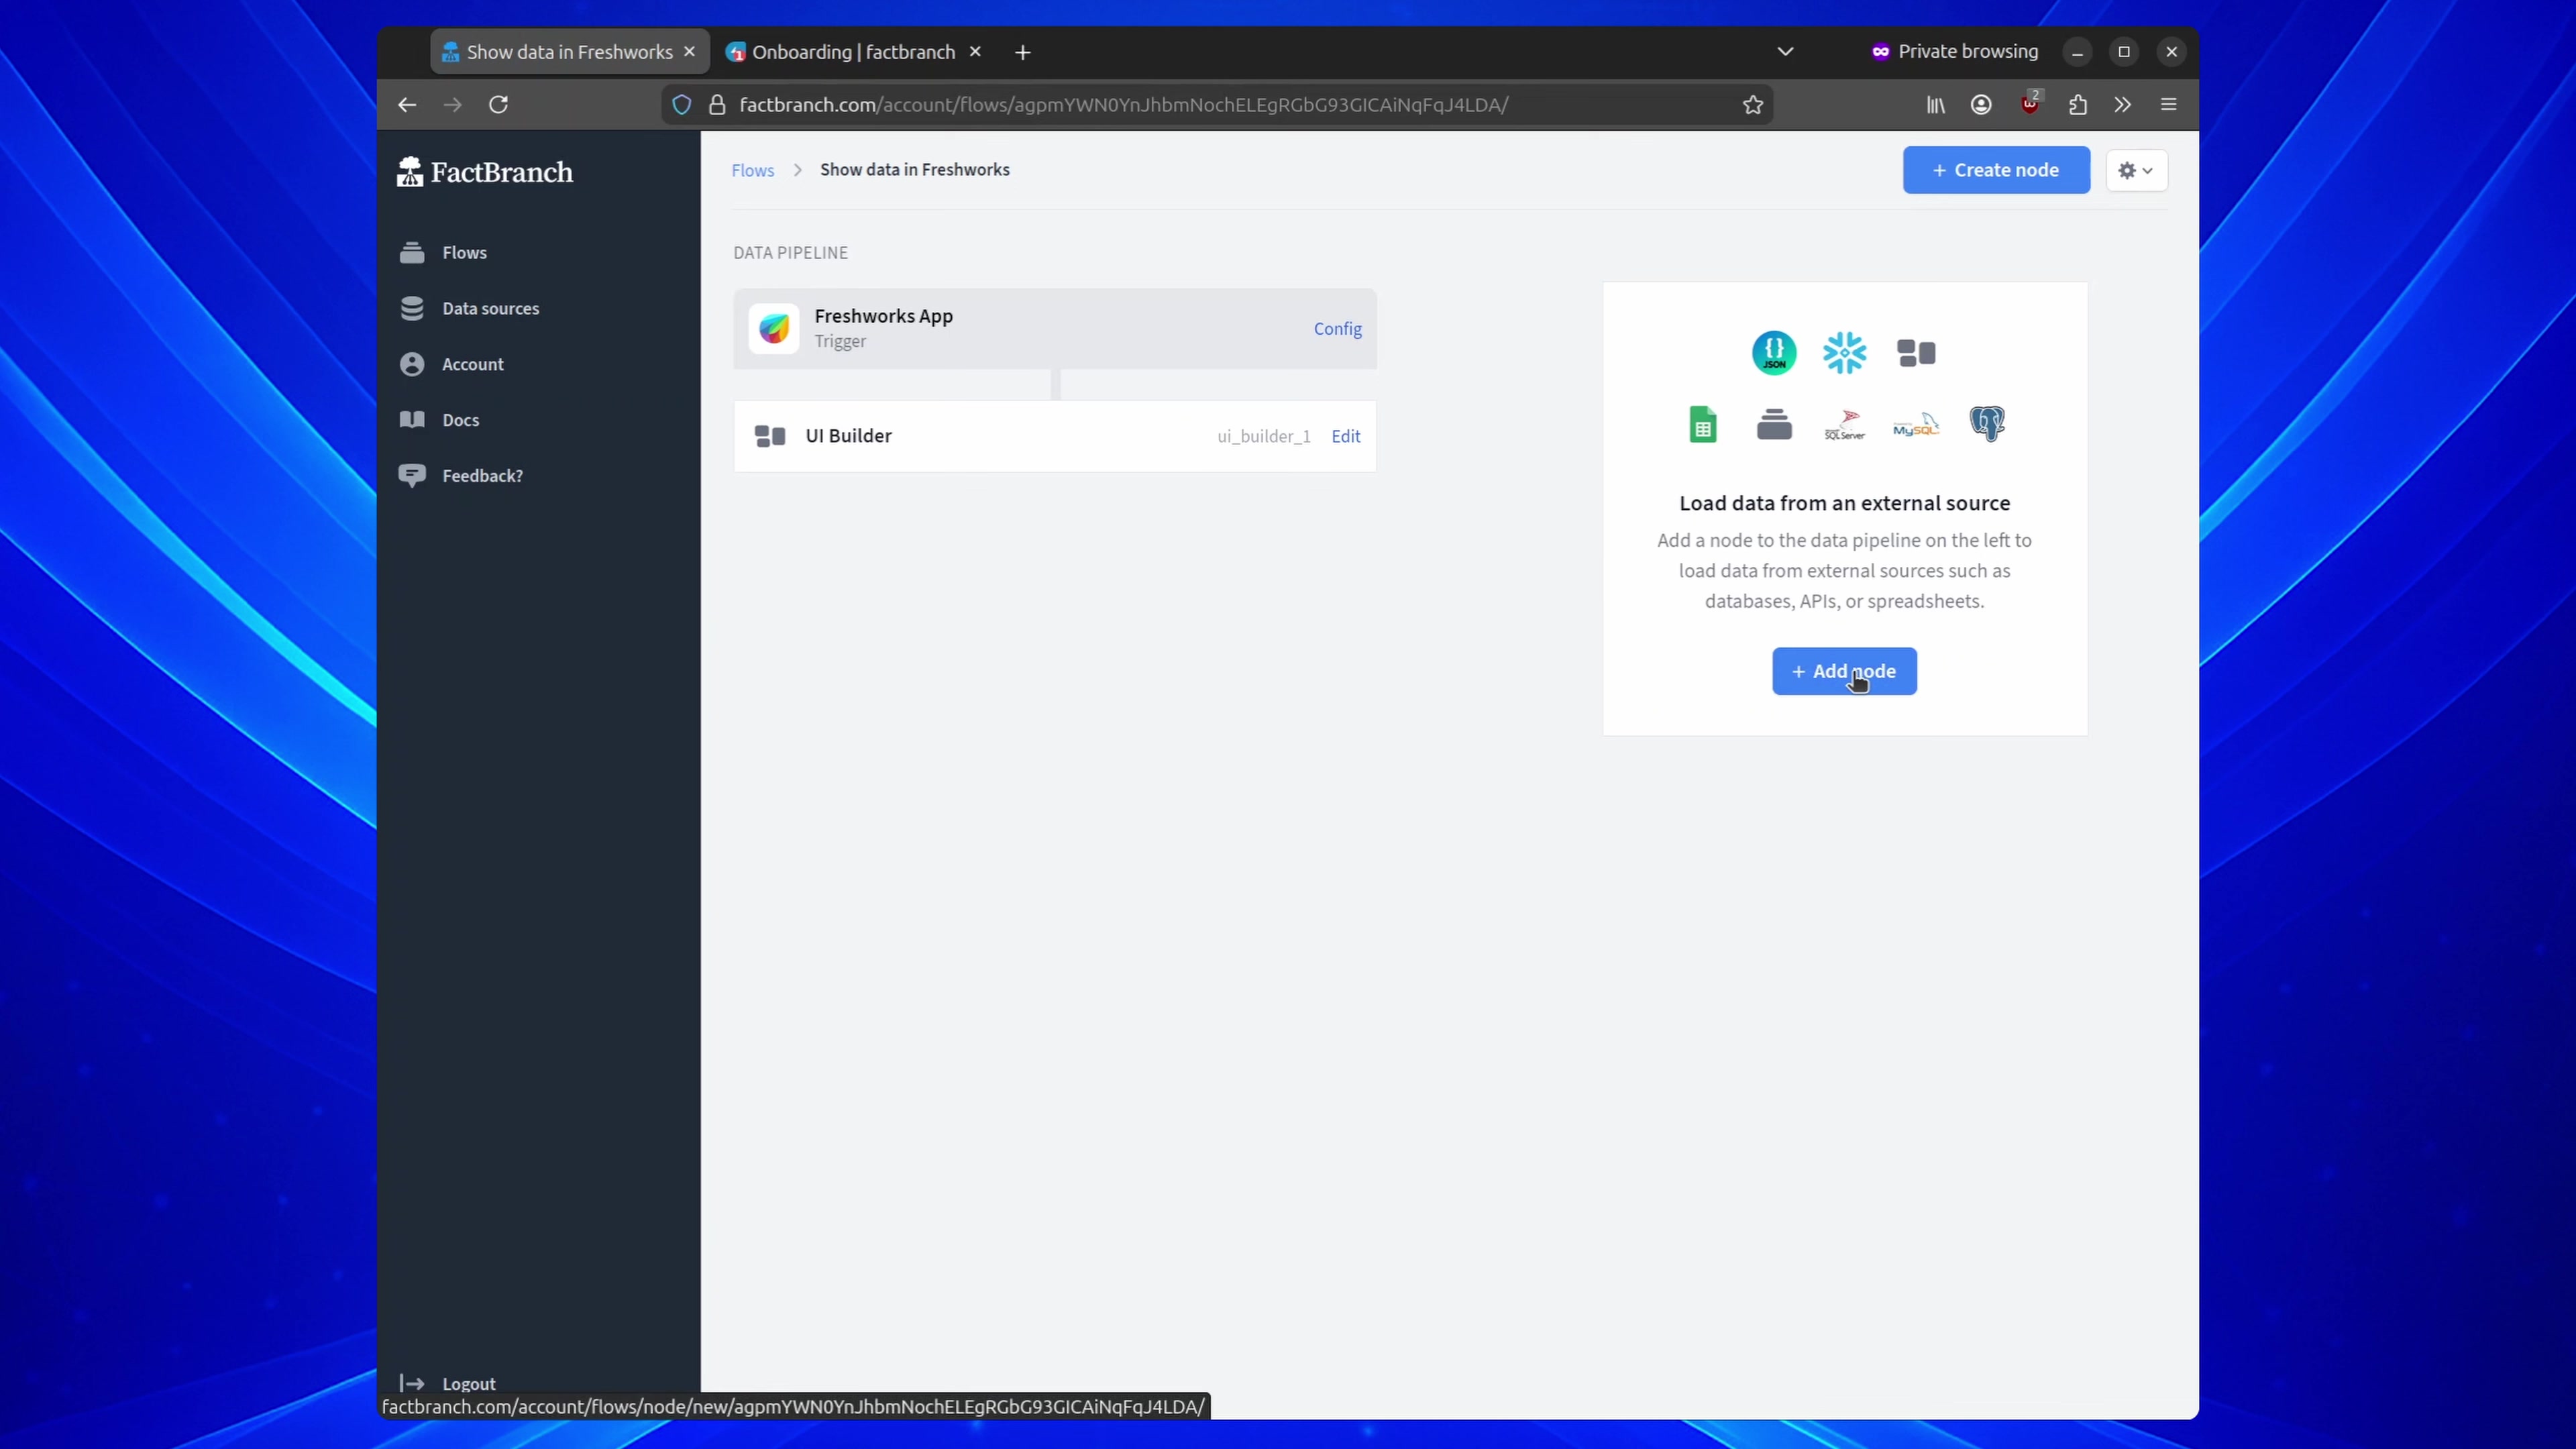
Next, you’ll add Snowflake to the pipeline. This is the piece that actually queries your warehouse and returns the customer record you want to show agents.
If it’s your first time connecting Snowflake to FactBranch, you’ll be prompted for credentials. One detail that trips people up: the account identifier should be the first part of your hostname - not the full Snowflake domain.
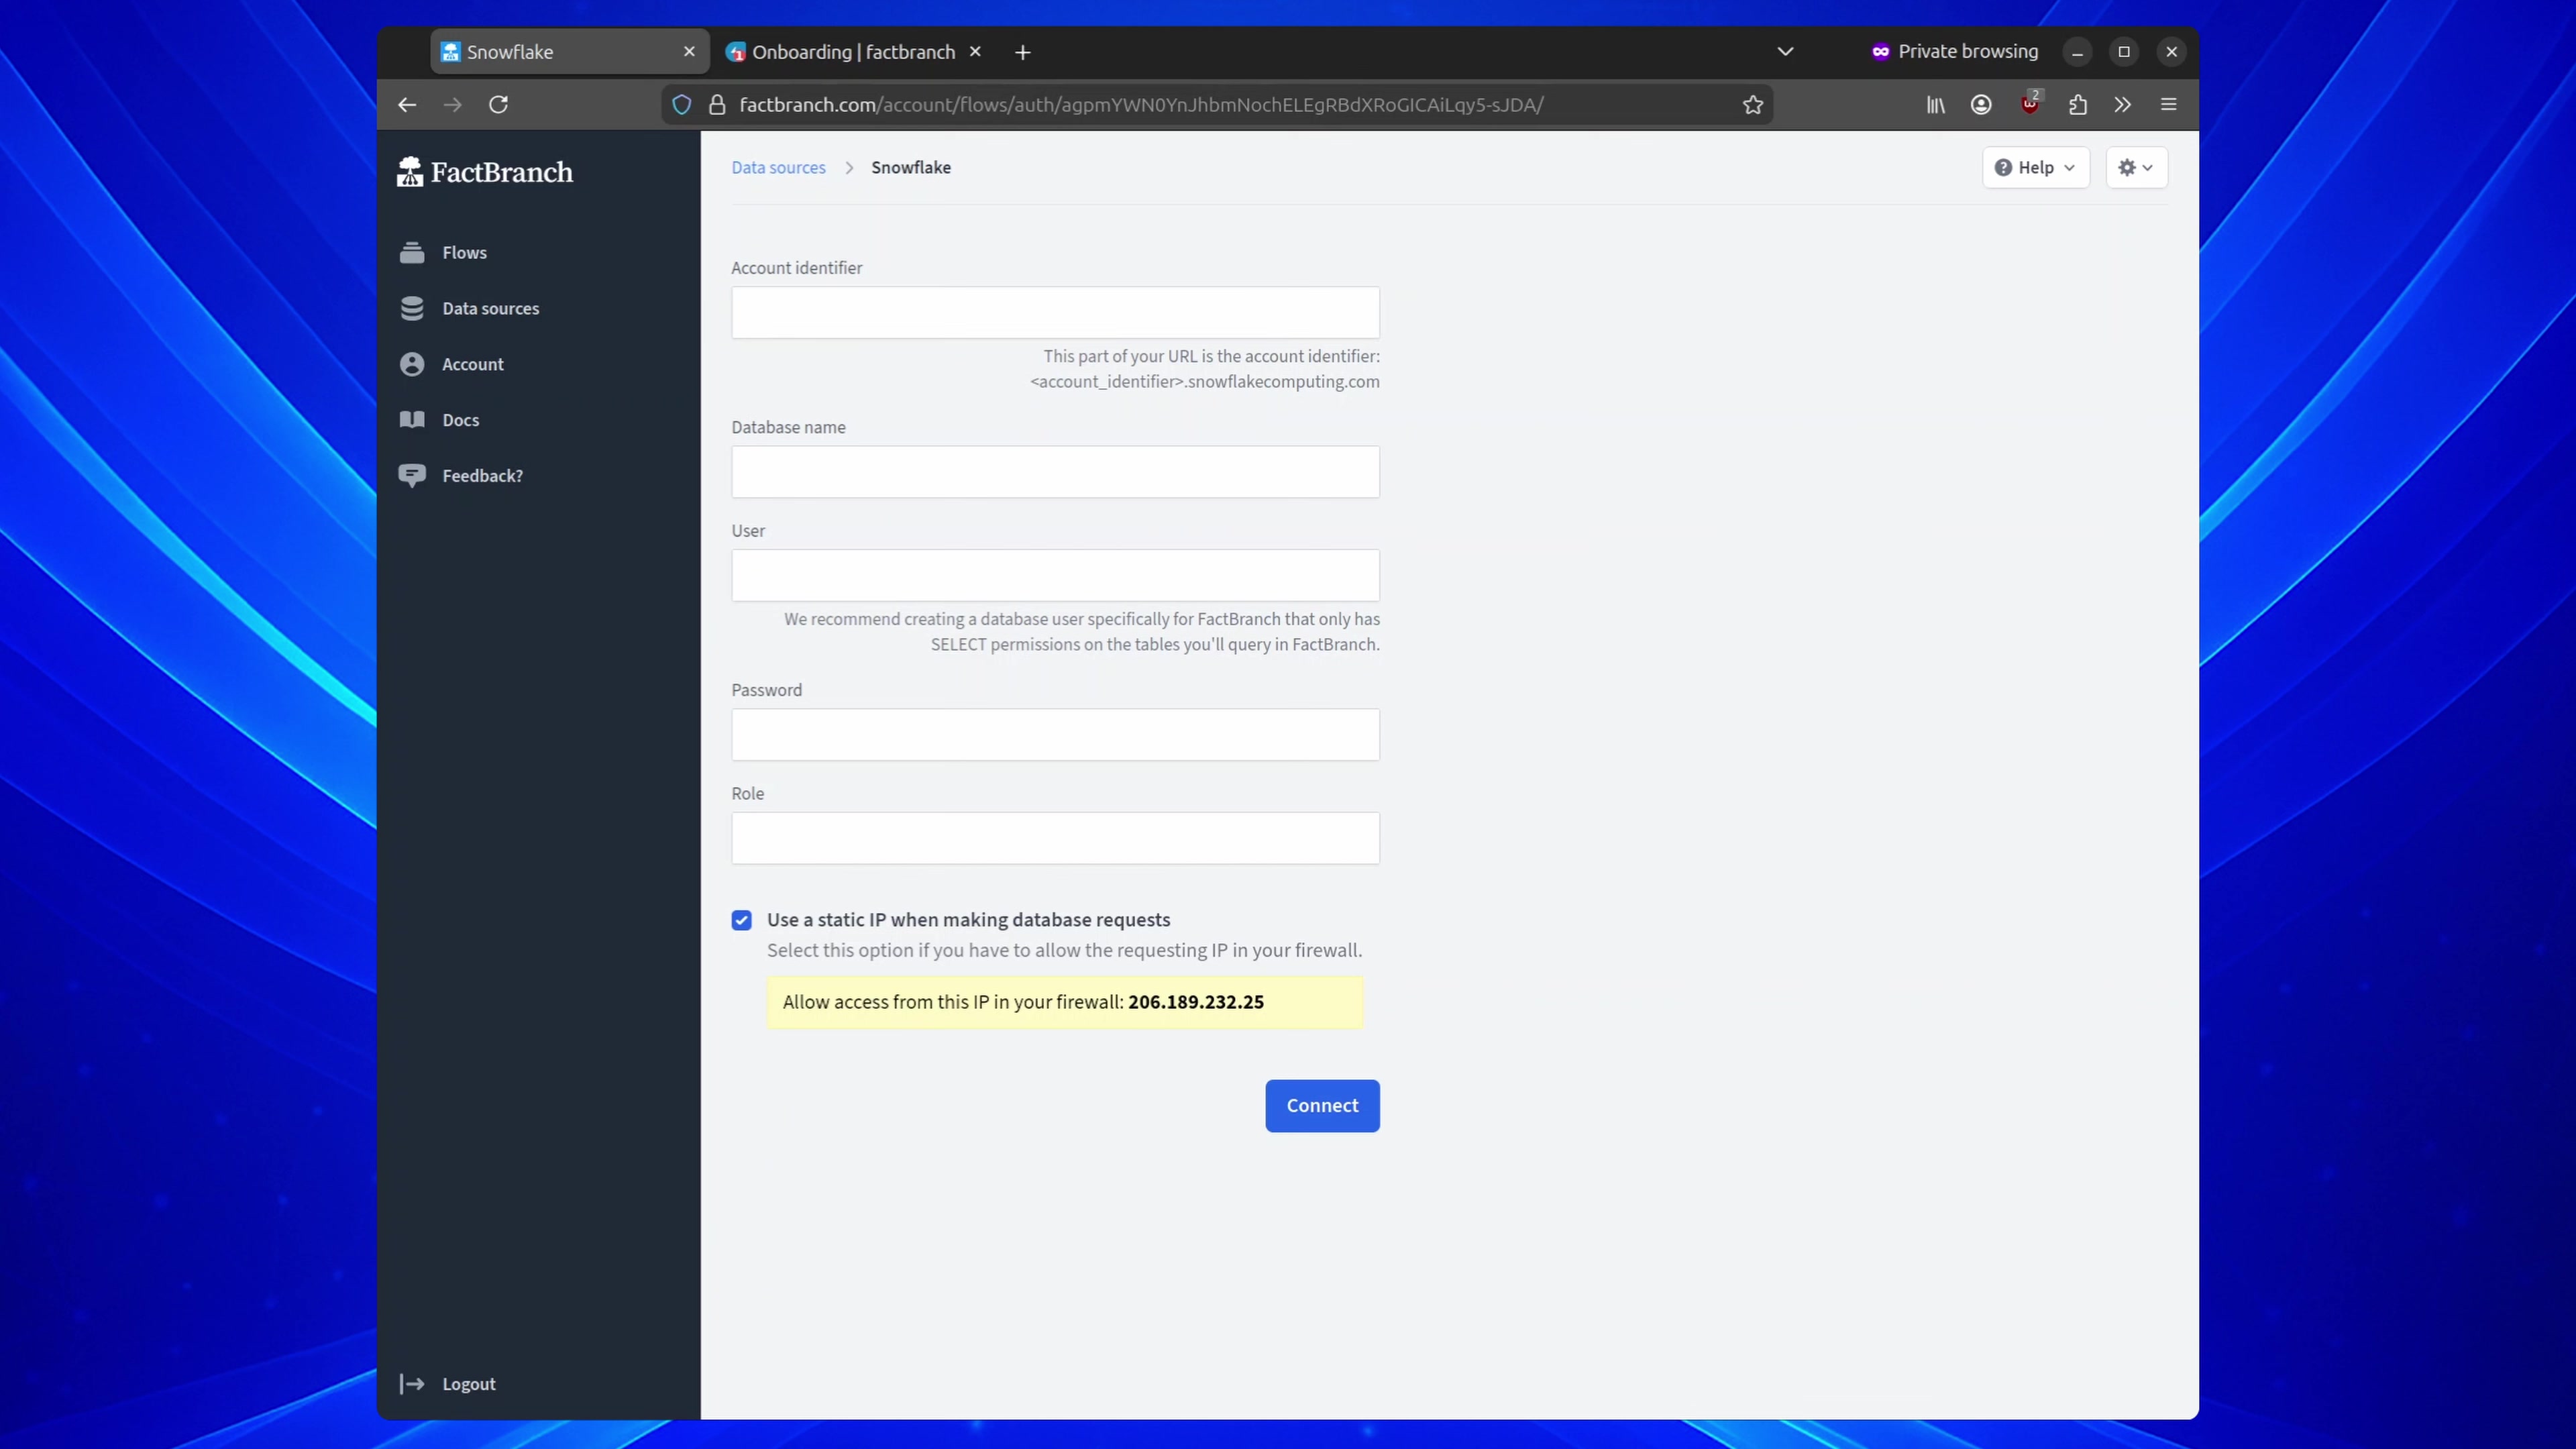
If your organization restricts database access by IP, you can make this setup much easier by using a static IP for requests. FactBranch surfaces the IP address you’ll need to allowlist, so you can copy it straight into your Snowflake network policy rules.

Once connected, you’ll be dropped back into the Snowflake node, ready to write your query.
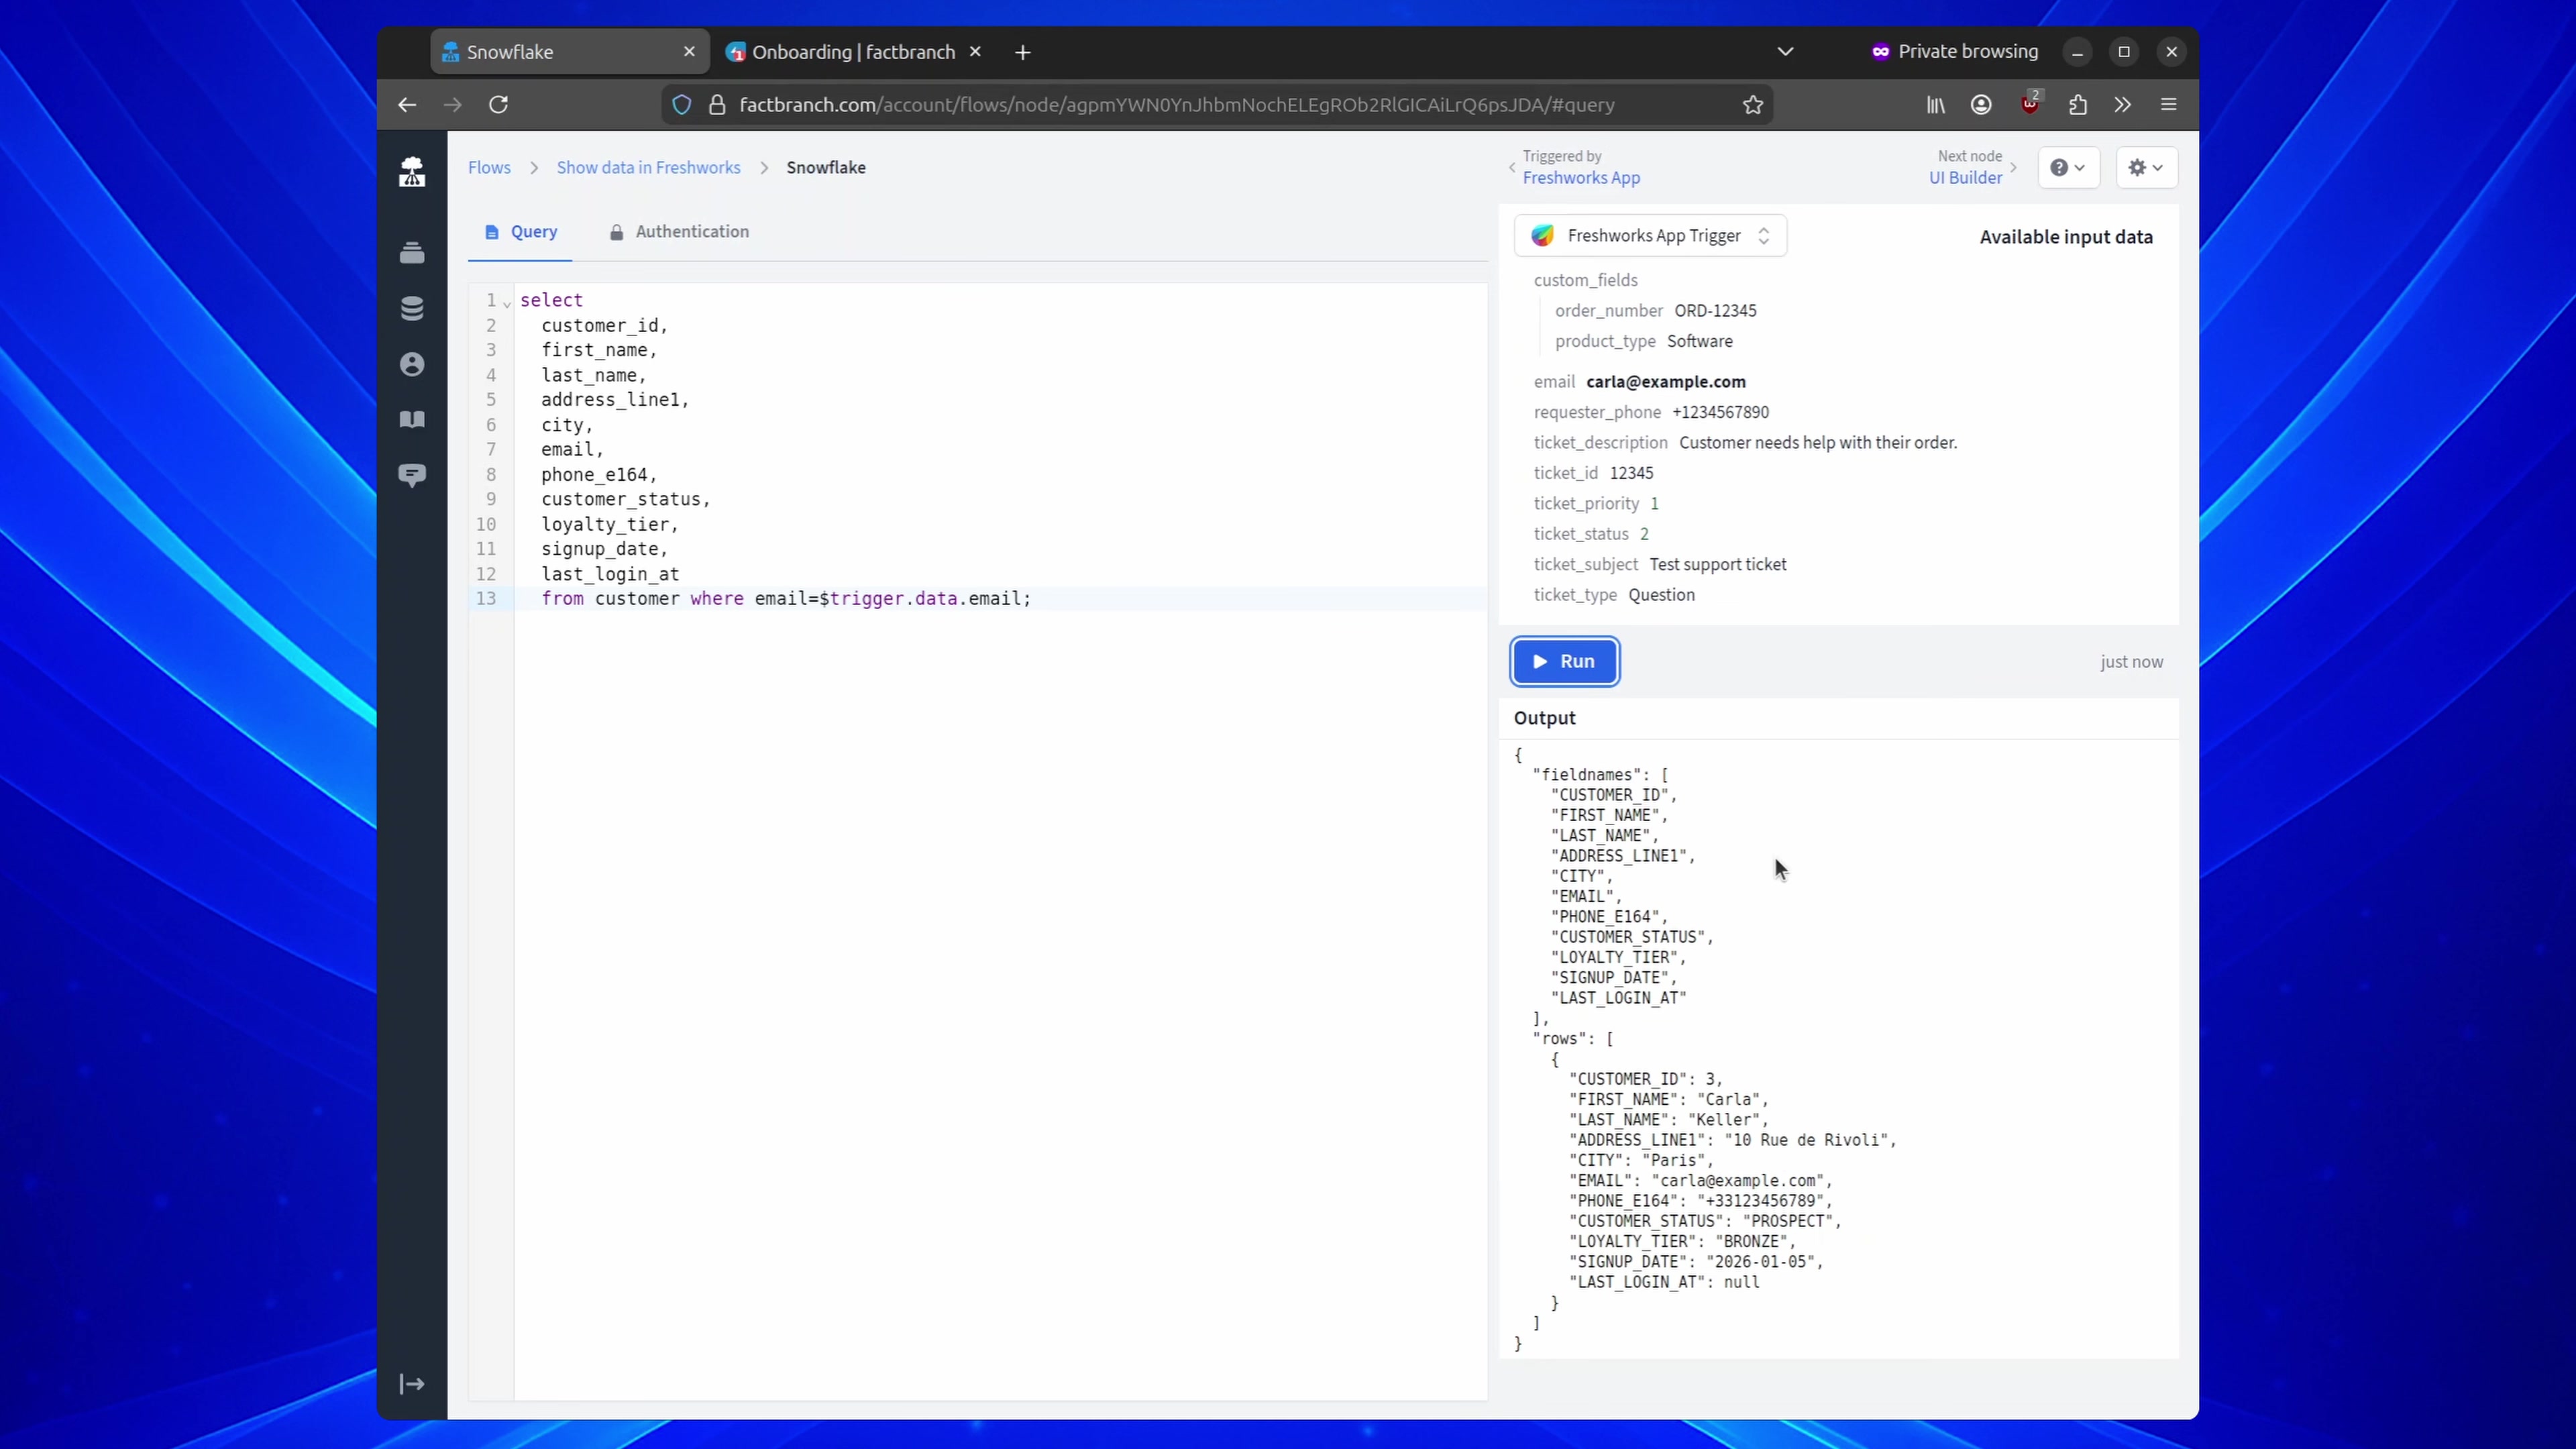
In the Snowflake node, you can run any SQL you like. A common pattern for support workflows is: “Given the requester on the ticket, find the matching customer row.” That usually means filtering by email address.

Here’s where FactBranch gets especially useful: you can use placeholder variables in your SQL based on the data coming from FreshService. Instead of hardcoding an email, you reference the requester’s email from the trigger payload.
To do that, grab the variable path from the input data panel and paste it into your query.
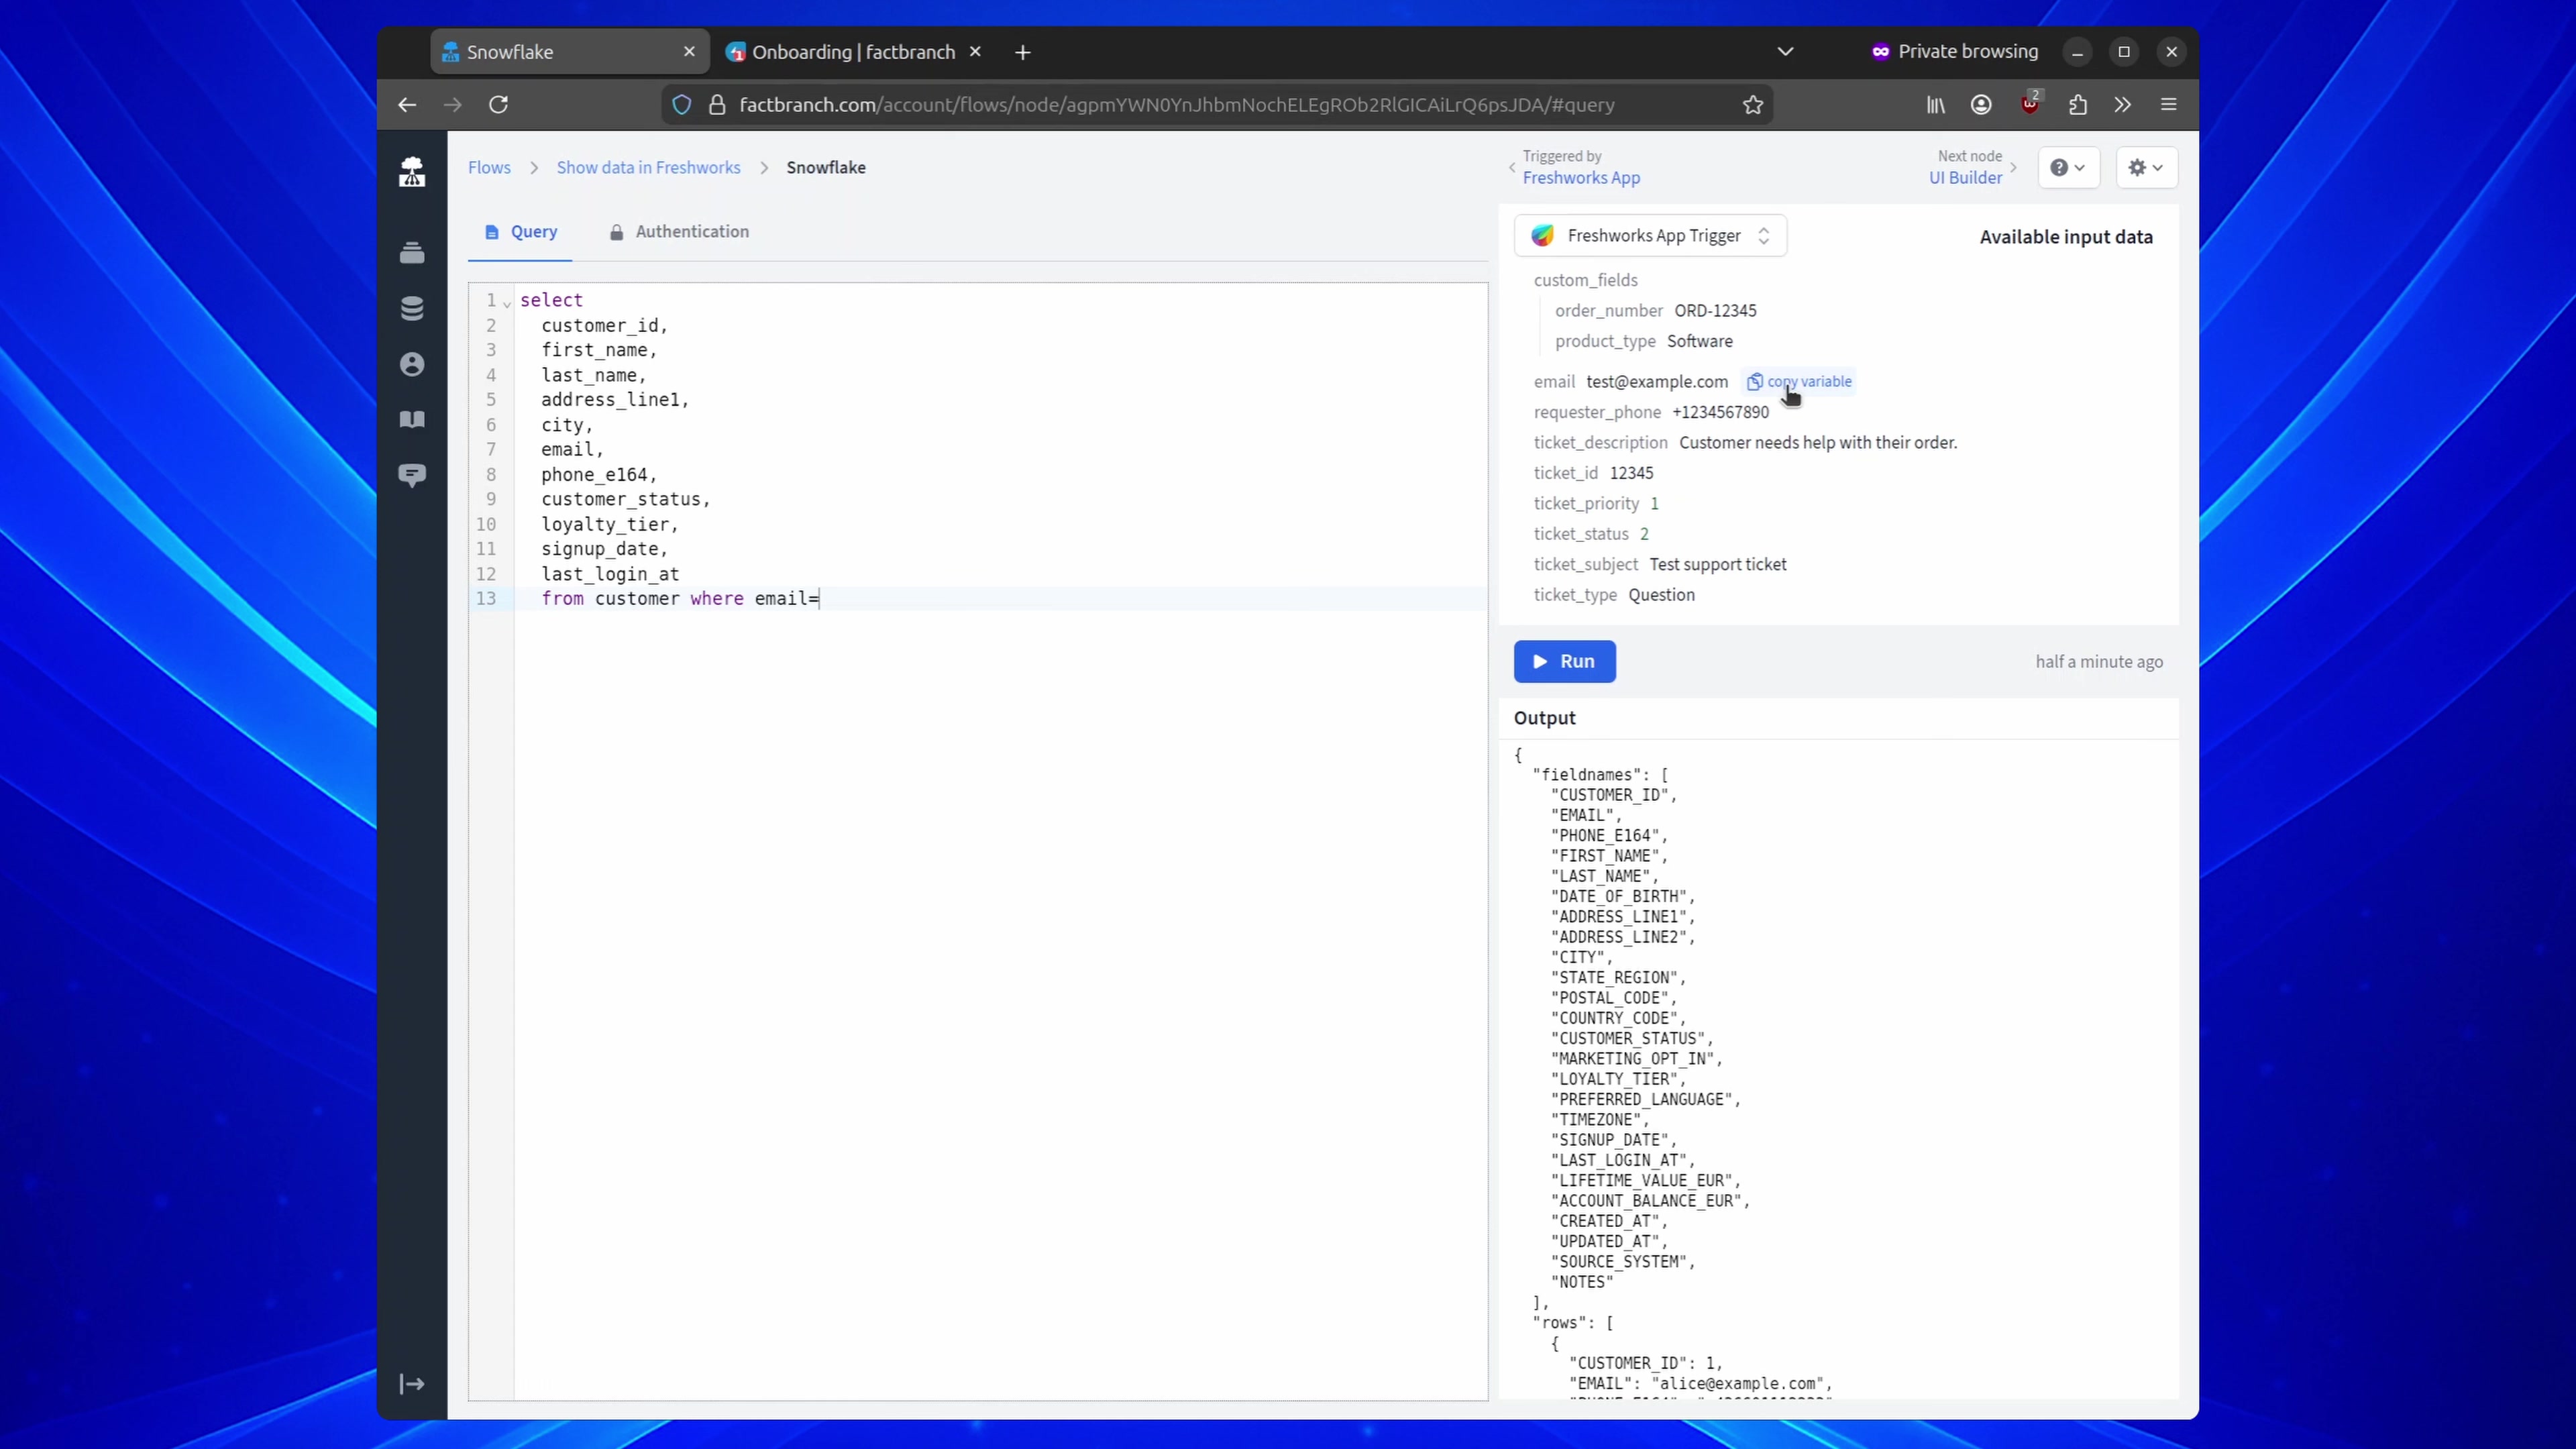
When you run the query, the results will reflect whatever email is currently coming from the ticket context. If the email doesn’t exist in your table, you’ll get zero rows - which is actually a nice, clean signal that there’s no matching customer record.
After updating the filter to an email that exists in the demo data, you’ll see the query return the expected row.
At this point, the pipeline is successfully pulling customer data out of Snowflake. Now we just need to decide how it should look inside FreshService.
FactBranch includes a UI builder that takes the data returned by your Snowflake node and turns it into something an agent can scan quickly. If you want to move fast, you can auto-generate a UI from the fields you selected.
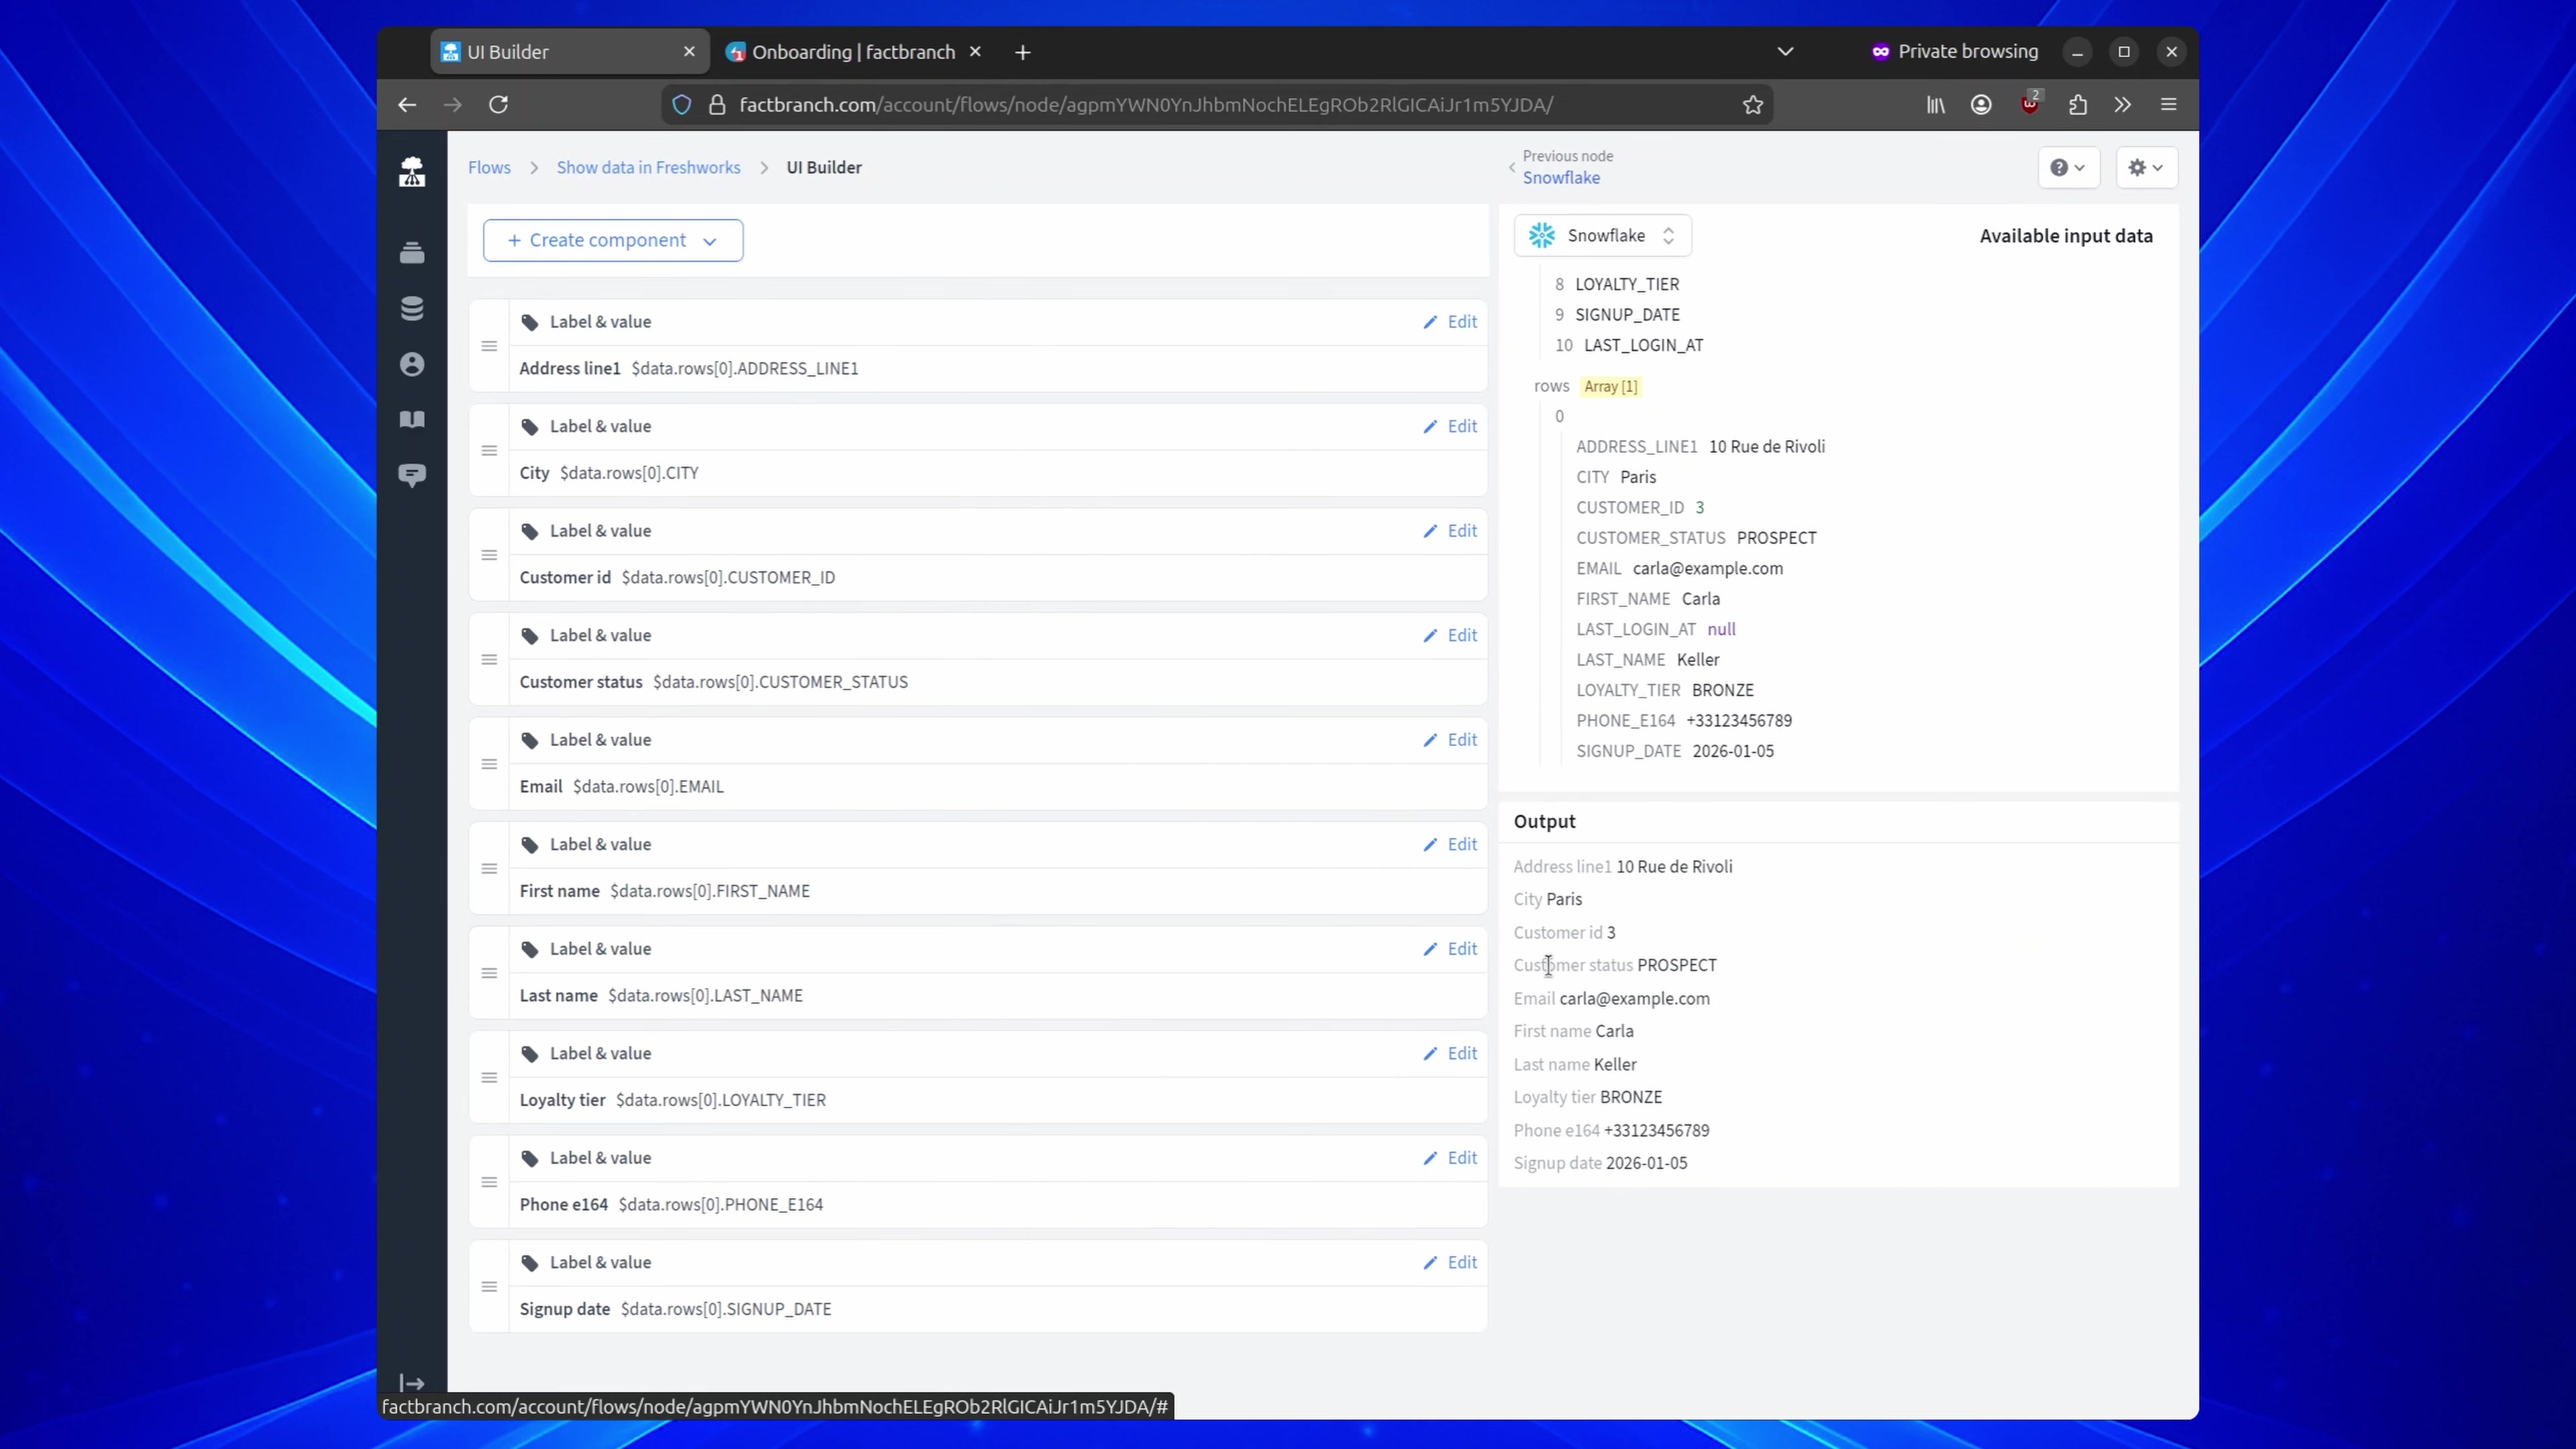
You’ll get a straightforward layout with labels and dynamic values. From there, you can tweak the structure, rename labels, hide fields you don’t want agents to see, or add extra elements.
One of the most practical additions is a direct link to your internal admin tooling - especially if you can pass an ID or email into the URL using a placeholder variable.
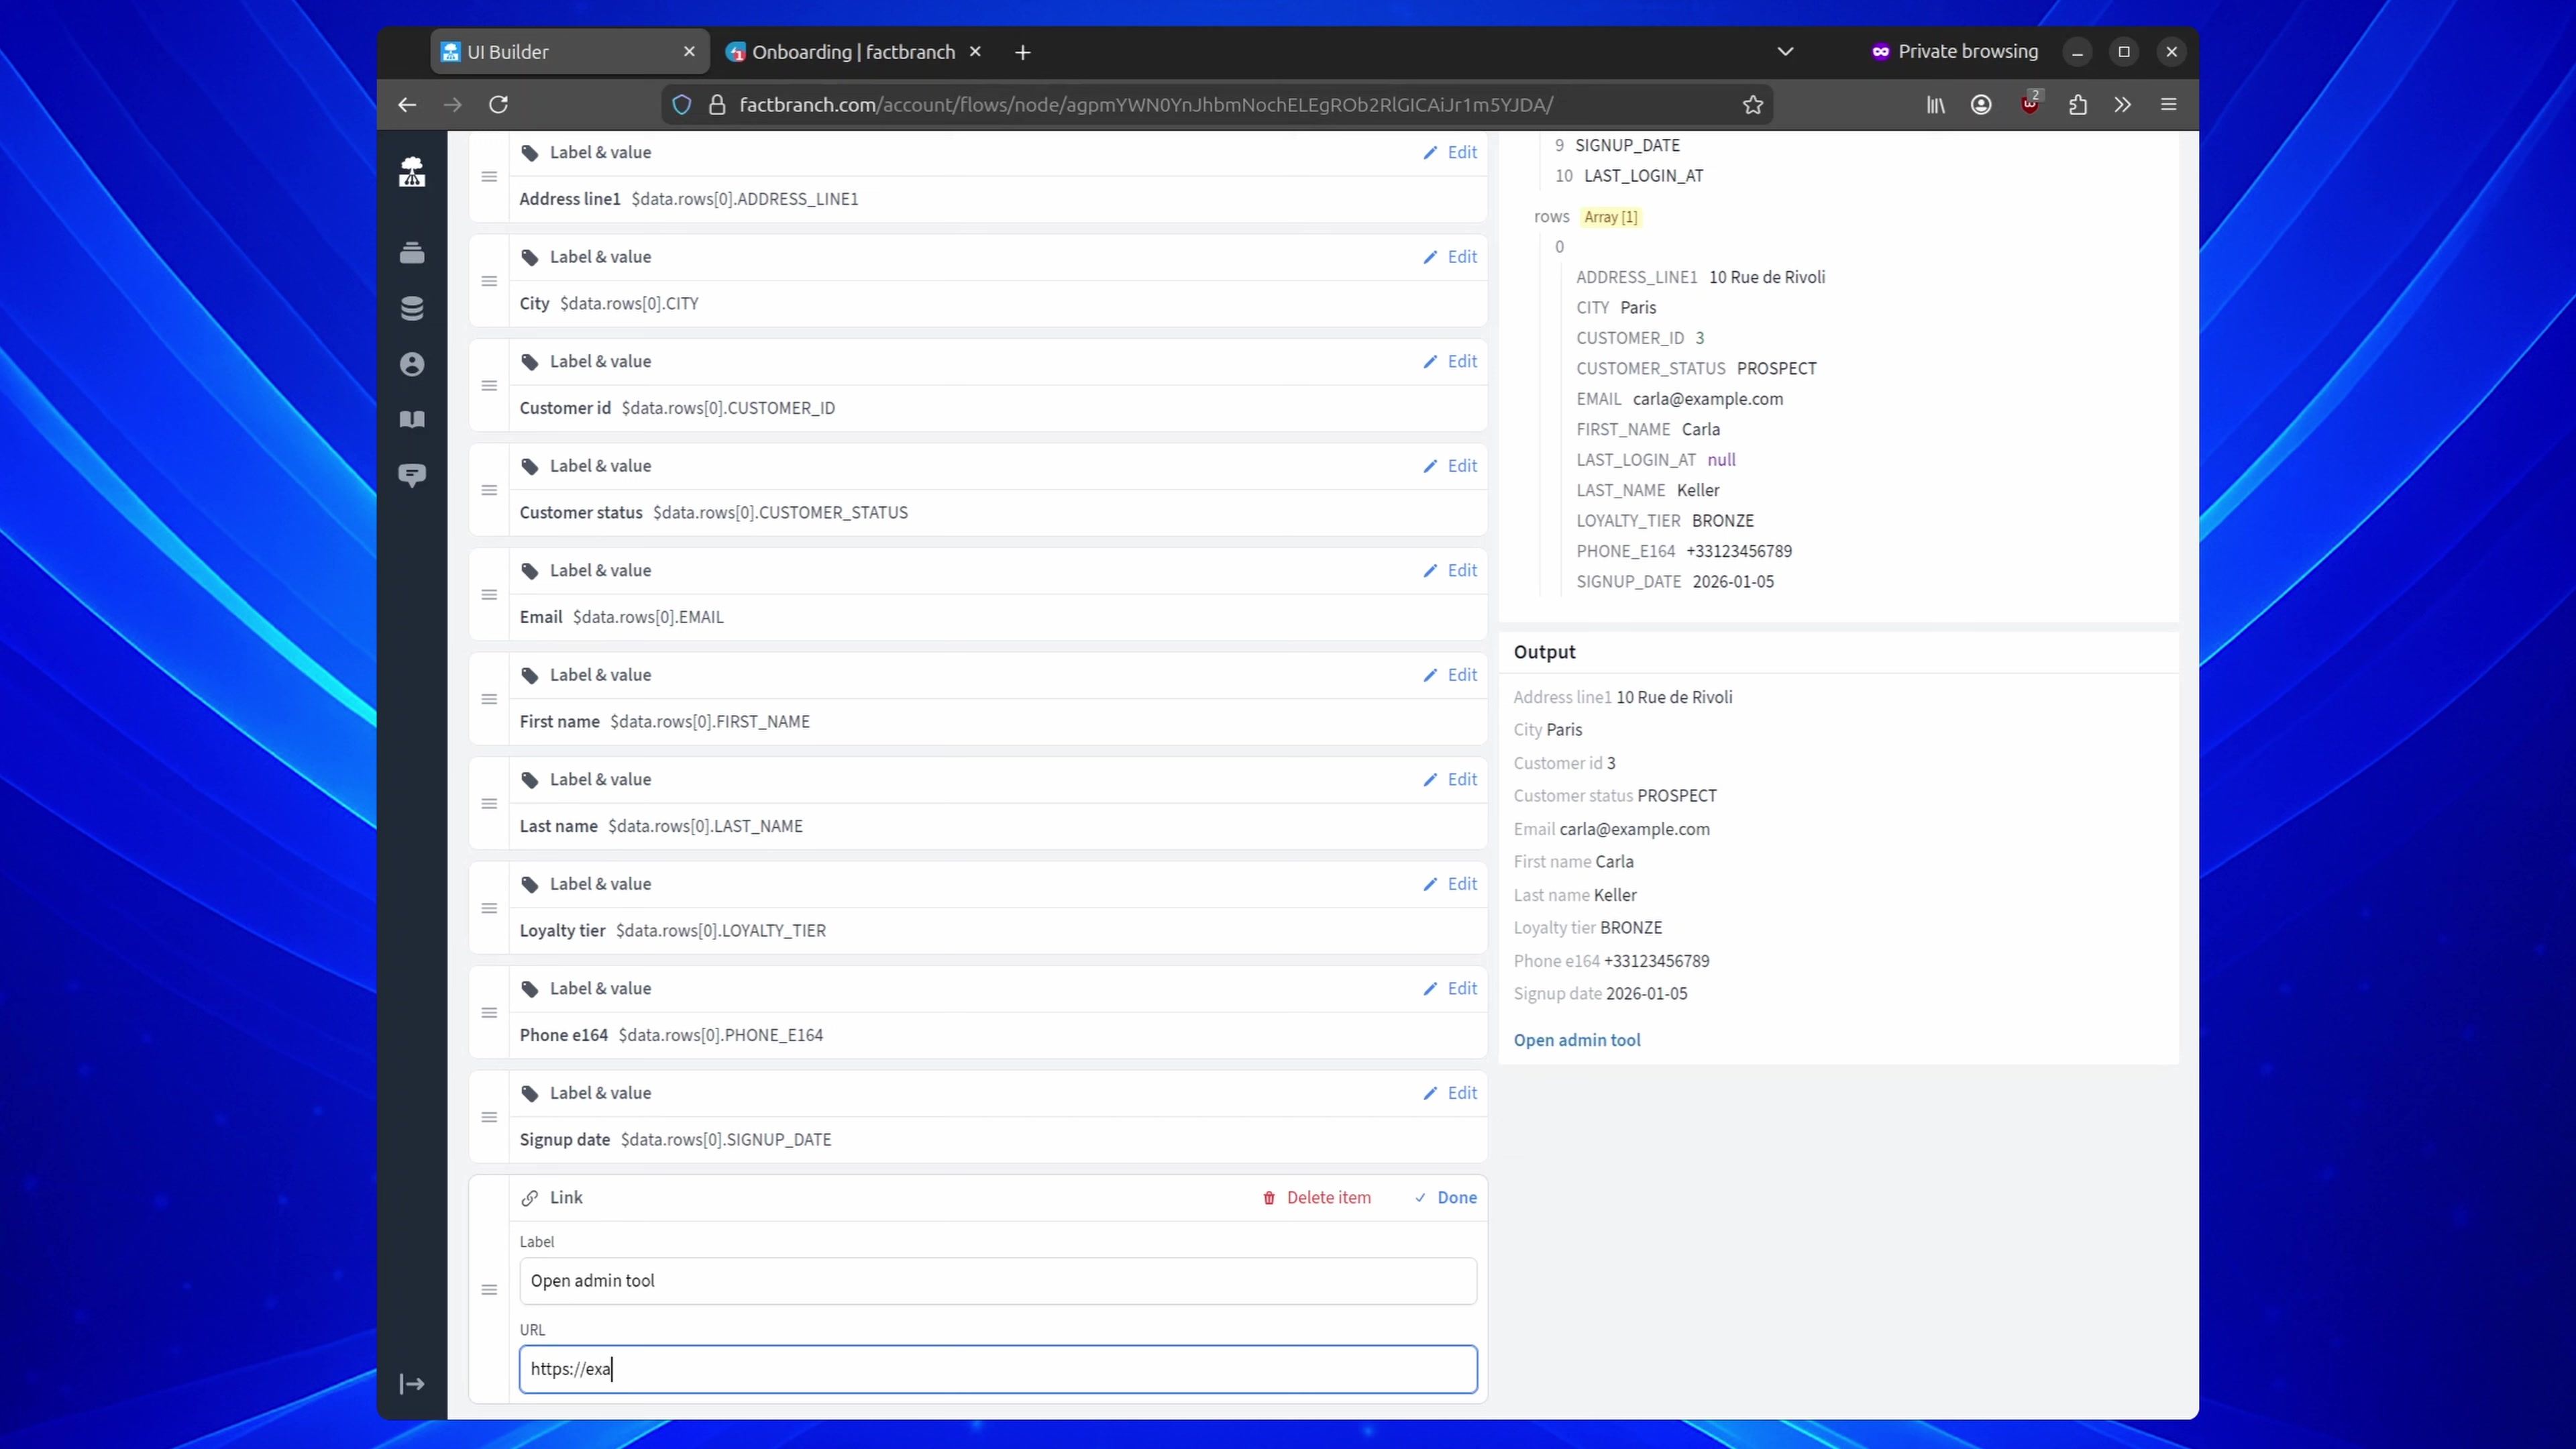
That way, the link is always relevant to the ticket you’re viewing, without anyone copying and pasting identifiers between systems.
Once your pipeline and UI are ready, you install the FactBranch app into FreshService. The key step here is grabbing the API key from the Freshworks trigger configuration in your pipeline and using it during the app installation in FreshService.
After that, everything snaps into place: open any ticket, launch FactBranch, and the sidebar will populate with the customer data pulled in real time from Snowflake.
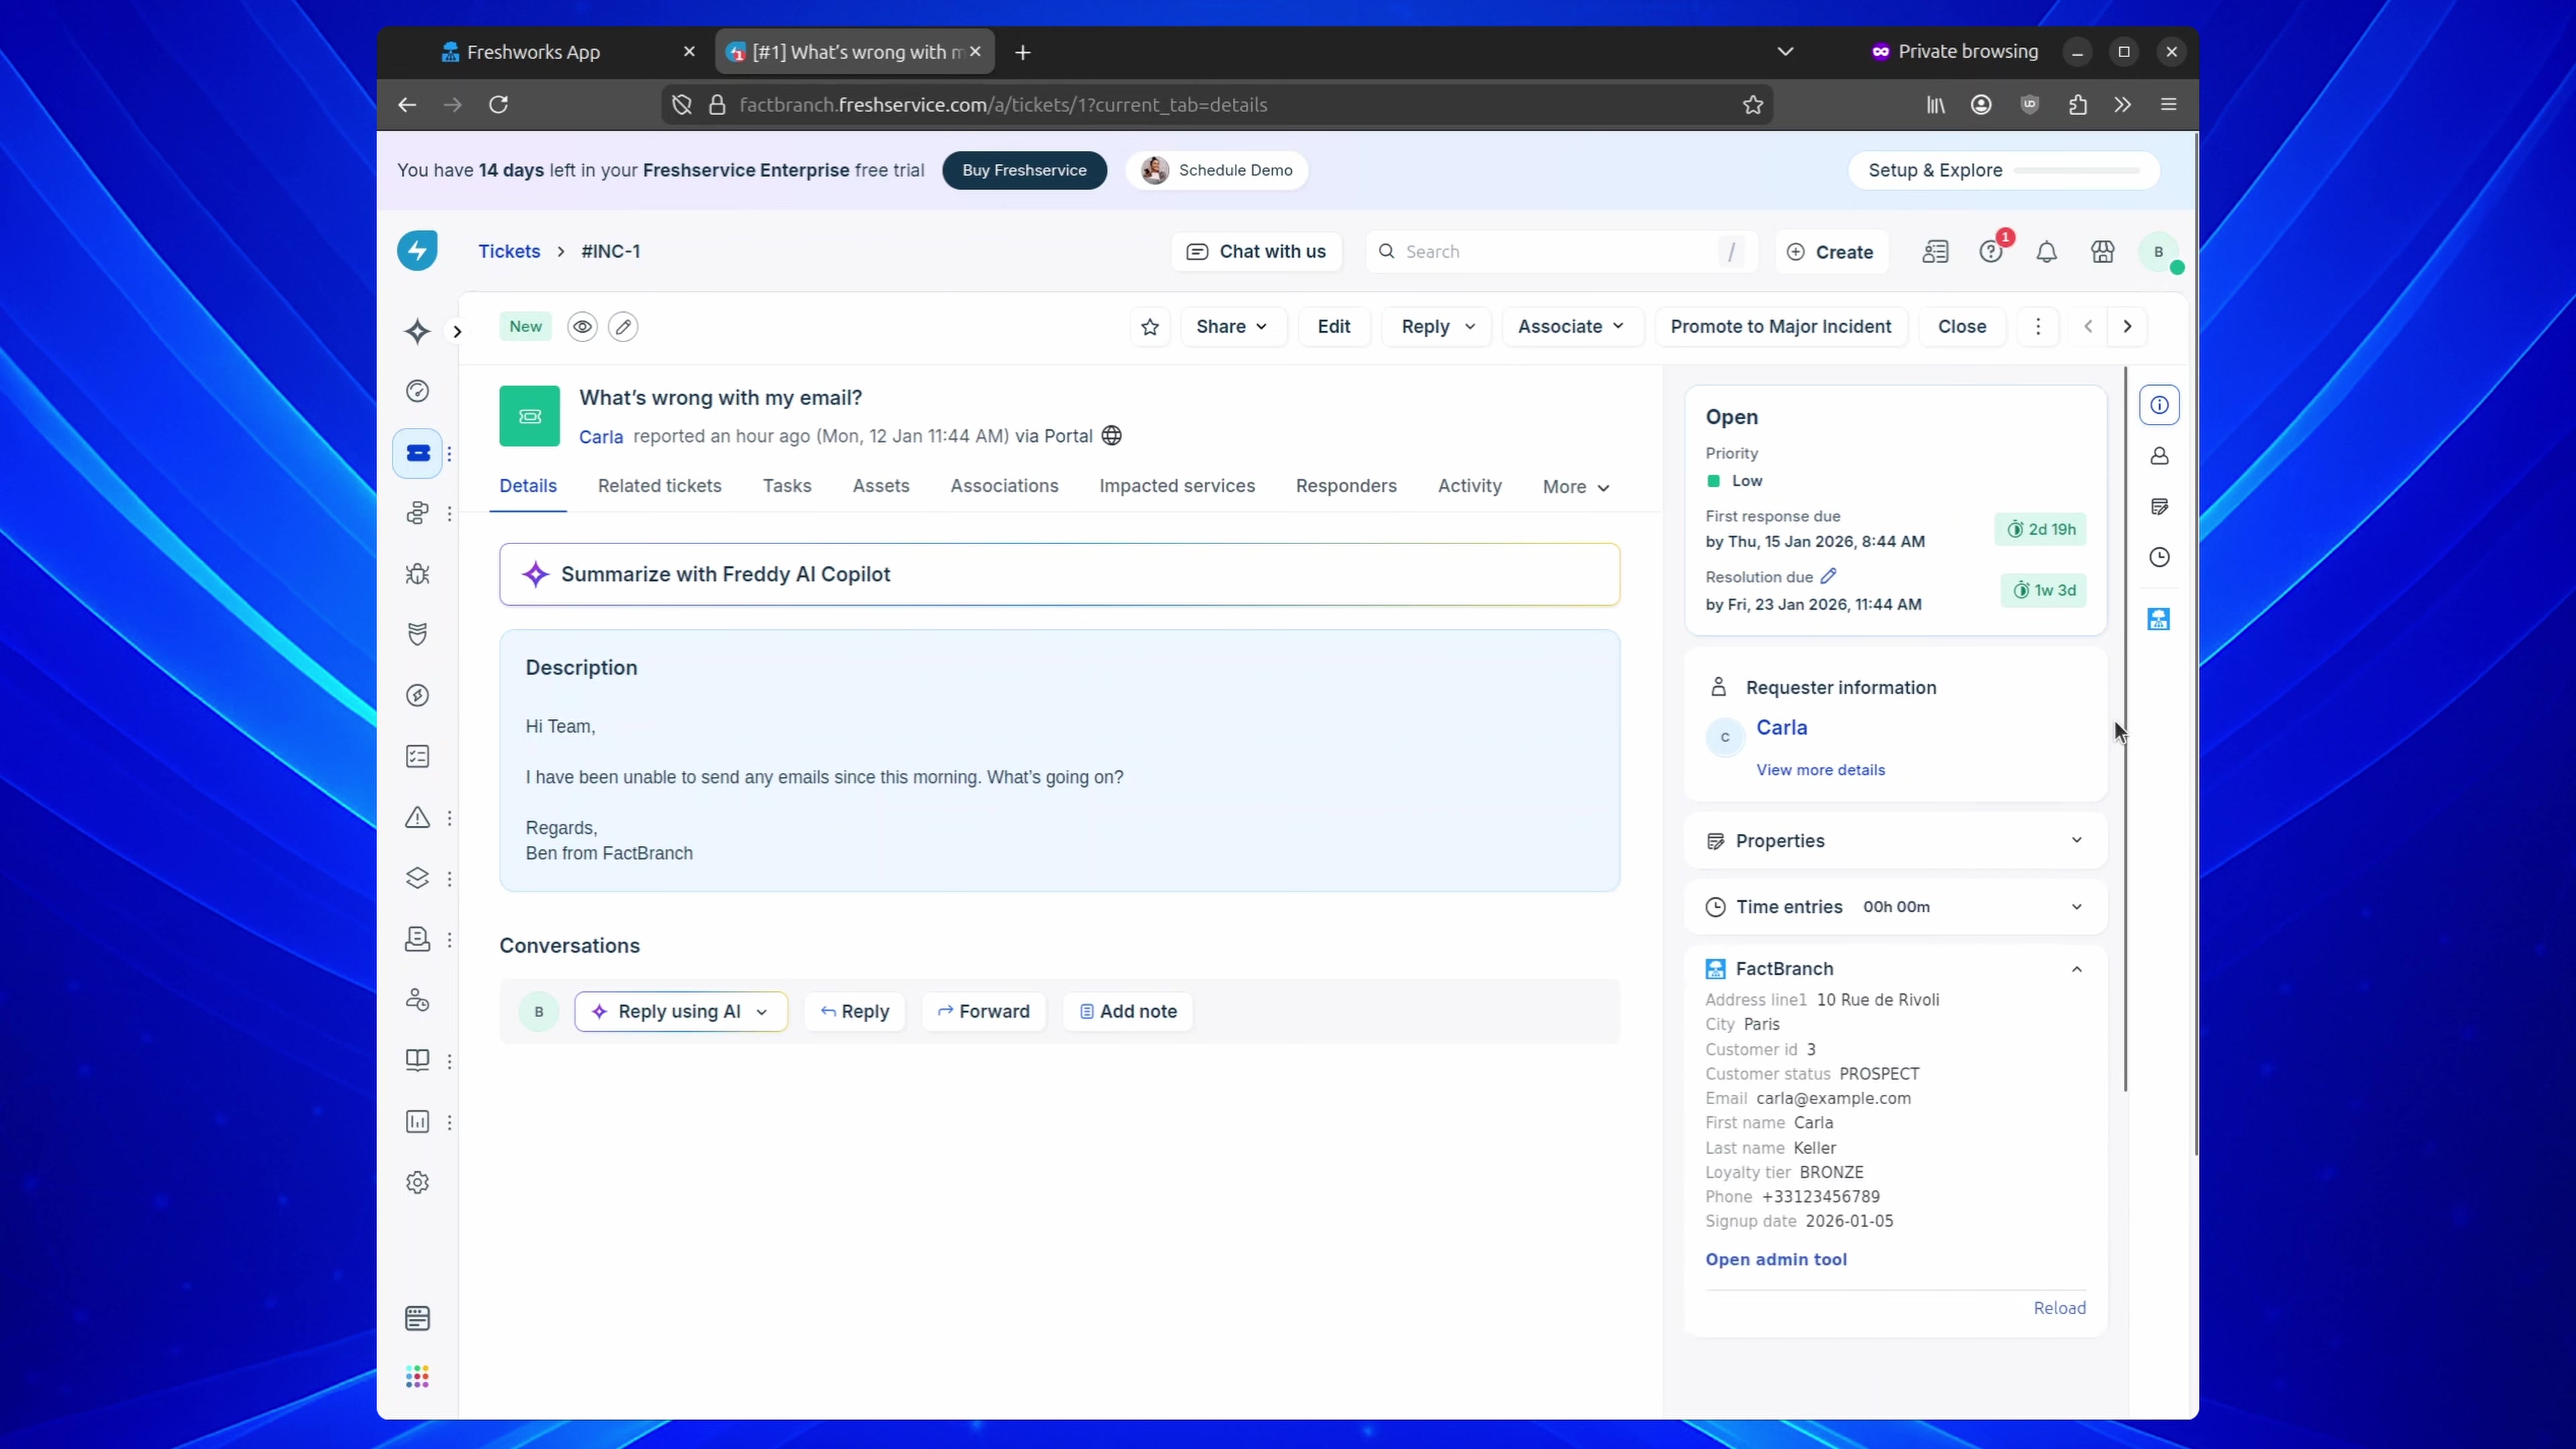
When customer context is embedded right beside the ticket, support gets faster and cleaner: fewer context switches, fewer mistakes, and far less time spent hunting for “the right record.” With FactBranch connecting FreshService to Snowflake, you’re essentially turning your data warehouse into a live, ticket-aware companion for your agents.
If you want to replicate this setup, start with a FactBranch free trial today. And if you run into any issues along the way, our support team can help at support@factbranch.com.
Don't forget to check out our docs to learn more about the Snowflake node in FactBranch and how to connect FactBranch to your Snowflake database.
Load data from your Snowflake data lake via SQL
How to connect to your Snowflake instance
Learn how to effectively handle errors in Google Sheets using the IFERROR function. Discover common use cases and examples where IFERROR can help catc...
In this step-by-step tutorial you'll learn how to trigger a flow in FactBranch whenever a new ticket is created in Zendesk.
Sign up for our newsletter to get our freshest insights and product updates.
We care about the protection of your data. Read our Privacy Policy.