Prerequisites
- You should already have created a Flow.
- You should have an external service or application that can send HTTP POST requests.
A webhook trigger allows you to use FactBranch as an endpoint for external services to send data to. When your external service sends a POST request to your FactBranch webhook URL, it triggers your Flow and processes the incoming data through your data pipeline.
This is perfect for real-time data processing, integrating with third-party services, or building automation workflows that respond to external events.
In this article you'll learn:
Creating a webhook trigger
When you create a new Flow in FactBranch, you can select "Use FactBranch as a webhook" as your trigger type. This creates a Flow with a webhook trigger that:
- Provides you with a unique webhook URL
- Generates a secure Bearer token for authentication
- Accepts HTTP POST requests with JSON payloads
- Passes the incoming data to your Flow's first node
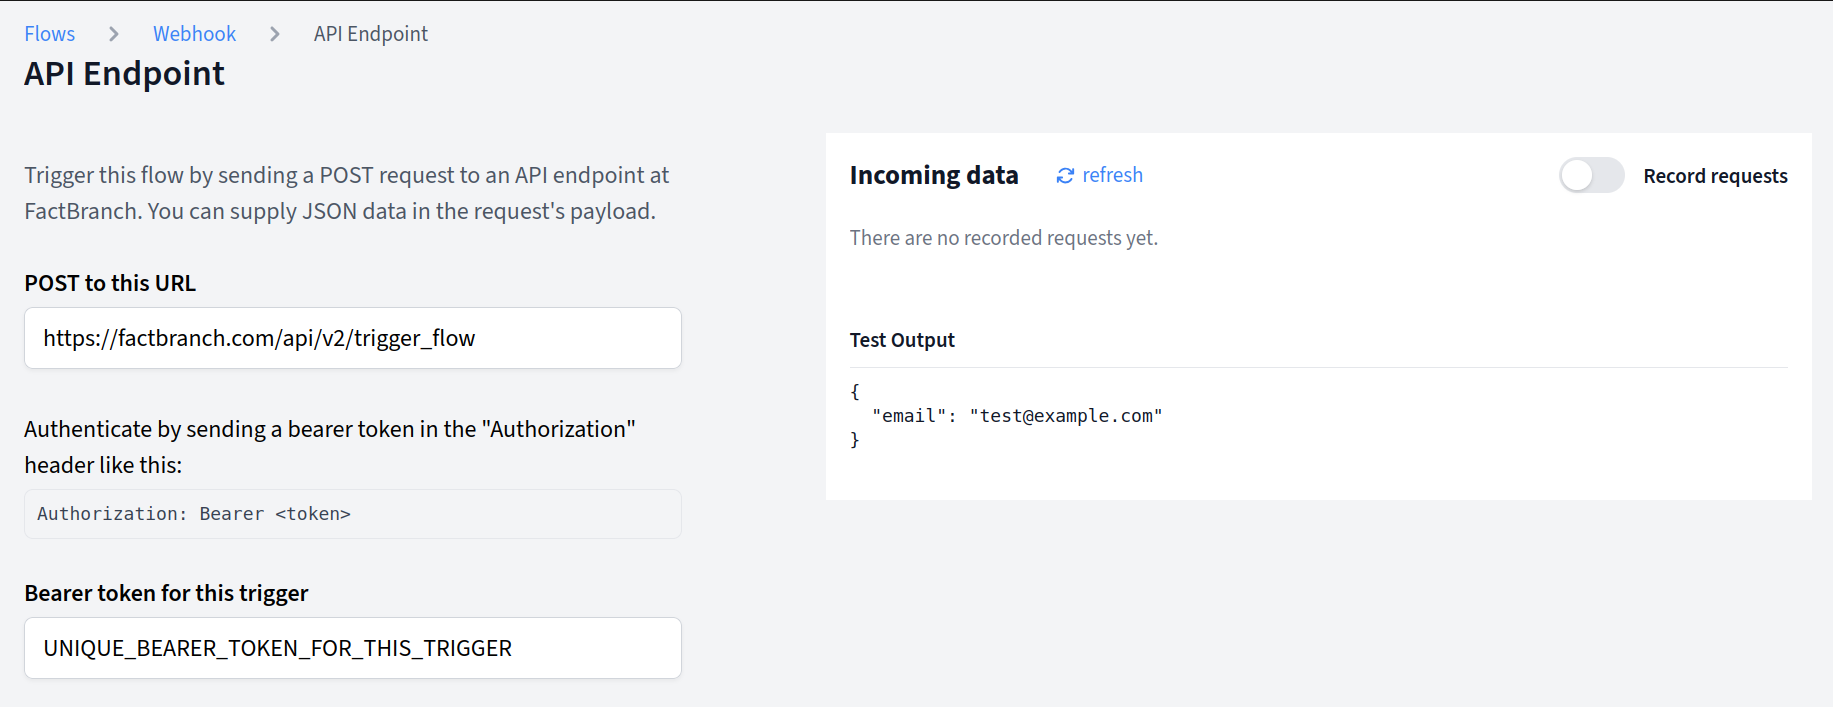
Setting up your webhook endpoint
After creating a Flow with a webhook trigger:
- Click Config next to the trigger block in your Flow
- You'll see your unique webhook details:
- Webhook URL - The endpoint to send POST requests to
- Bearer Token - Used for authentication (include in Authorization header)
- Content-Type - Must be
application/json
Copy these details to configure your external service.
Configuring external services
To send data to your FactBranch webhook, configure your external service to make HTTP POST requests:
URL: Your unique webhook URL from the trigger config page
Method: POST
Headers:
Authorization: Bearer YOUR_BEARER_TOKEN
Content-Type: application/json
Body: Valid JSON data that you want to process in your Flow
Example request
curl -X POST https://api.factbranch.com/webhooks/your-unique-id \
  -H "Authorization: Bearer your-bearer-token" \
  -H "Content-Type: application/json" \
  -d '{
    "customer_id": "12345",
    "event": "order_created",
    "order": {
      "id": "ord_987654",
      "total": 199.99,
      "status": "pending"
    }
  }'
Testing your webhook
Recording incoming requests
To test your webhook and capture real data:
- In the trigger config page, activate Record requests
- Send a test request from your external service
- Click reload in the Incoming data section
- You should see your test request appear in the list
Using test data
- Click on a recorded request to view its content
- Click Use as test data to use that data for testing your Flow
- Deactivate Record requests when you're done testing
This test data will be used when you run individual nodes in your Flow during development.
Common use cases
E-commerce integrations
Process order events from your online store:
{
  "event": "order.created",
  "order_id": "12345",
  "customer_email": "customer@example.com",
  "total": 149.99
}
Handle contact form submissions from your website:
{
  "name": "John Doe",
  "email": "john@example.com",
  "message": "I'm interested in your services",
  "source": "contact_form"
}
CRM events
Sync data when records are updated in your CRM:
{
  "event": "lead.updated",
  "lead_id": "lead_456",
  "status": "qualified",
  "score": 85
}
System monitoring
Receive alerts from monitoring systems:
{
  "alert": "high_cpu_usage",
  "server": "web-01",
  "cpu_percent": 95,
  "timestamp": "2025-01-01T10:30:00Z"
}
Security considerations
Bearer token authentication
- Always include the Bearer token in the Authorization header
- Keep your Bearer token secure and don't share it publicly
HTTPS only
- All webhook requests must use HTTPS for security
- FactBranch automatically enforces encrypted connections
Request validation
- FactBranch validates the Bearer token on every request
- Invalid or missing tokens result in 401 Unauthorized responses
- Only valid JSON payloads are accepted
Response handling
Successful requests
When your webhook receives a valid request:
- Triggers your Flow with the incoming data
- Processes data through your configured nodes
- Returns HTTP 200 OK response with the Flow execution result (the output from
the last node)
Error responses
Common error responses:
- 401 Unauthorized - Invalid or missing Bearer token
- 400 Bad Request - Invalid JSON or missing Content-Type header
- 404 Not Found - Incorrect webhook URL
- 500 Internal Server Error - Flow execution error
Rate limiting
FactBranch webhook endpoints have rate limiting to prevent abuse:
- 100 requests per minute per webhook endpoint
- Exceeding limits may return HTTP 429 (Too Many Requests)
- Contact support at support@factbranch.com if
you need higher limits for your use case
Troubleshooting
"401 Unauthorized" errors
- Verify you're including the correct Bearer token
- Check that the Authorization header format is:
Bearer YOUR_TOKEN
- Ensure you're using the token from the correct Flow
- Make sure you're making a POST request to the correct webhook URL
"400 Bad Request" errors
- Confirm your request body is valid JSON
- Include the
Content-Type: application/json header
- Check for any trailing commas or syntax errors in your JSON
"404 Not Found" errors
- Double-check your webhook URL is correct
- Ensure you're making requests to the exact URL provided
- Verify the Flow hasn't been deleted or renamed
Flow not executing
- Check that your Flow contains nodes.
- Review the Flow's node configuration for errors
External service configuration
- Verify your external service supports custom headers
- Check that it can send POST requests with JSON payloads
- Test with a tool like curl or Postman first
Best practices
Payload design
- Keep JSON payloads reasonably sized (< 1MB recommended)
- Use consistent field names and structure
- Include relevant metadata like timestamps and event types
Error handling
- Implement retry logic in your external service for failed requests
- Log webhook responses for debugging
- Have fallback procedures if webhook endpoints are unavailable
Testing
- Always test webhook integrations in a development environment first
- Use tools like ngrok for local testing during development
- Validate your JSON payloads before sending to production
Explore More About This Topic