Prerequisites
In this article we're looking at:
Like most nodes, the REST API node is divided into two main areas. The larger area on the left is for configuring the node and the Preview box on the right lets you test the node with test input data and shows you what the node returns.

First, let's look at the config area on the left.
If the API you're connecting to, requires some form of authentication, FactBranch allows you to store your credentials (username/password, API-key or a token) securely and separately from the node. This way you set the credentials once and then they never again show up in any of our UIs.
We also offer OAuth flows for the most popular data sources.
To use one of the API authentications, first create an authentication.
Then, in your REST API node, select the "Authentication" tab and select the authentication you've just created.
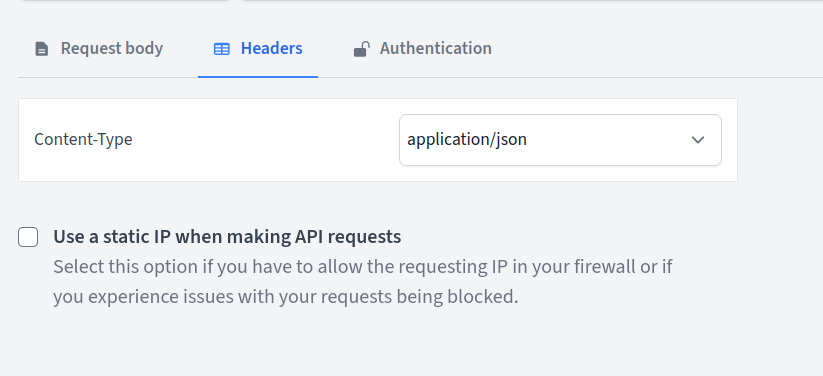
If the API you're connecting to requires IP whitelisting in their firewall, you can configure the REST API node to use a static IP address for all requests.
To enable this feature, check the "Use a static IP when making API requests" checkbox in the Headers tab. When enabled, all requests from this node will originate from FactBranch's static IP address. The IP address will be displayed in a yellow banner when you enable this option.

This is particularly useful when:
Firewall configuration
When using the static IP feature, make sure to add the displayed IP address to your API provider's firewall whitelist or allowed IP list.
At the top of your REST API node select one of the HTTP methods: GET, POST, PUT or DELETE. Right next to the method, paste the URL you want to request data from or send data to.

In the URL you can insert dynamic parameters from a previous node's output. See the section using placeholders below for more info.
Some requests require a request body to submit data. This is what the big field at the Payload tab is for. Insert a valid JSON body here. You can also use placeholders in the body. See the section using placeholders below for more info.
In order for placeholders to be substituted with real data, we first need to define some test data. So let's look at the Preview box on the right.
Most nodes use dynamic data somewhere (more on using placeholders for dynamic data in the next section below) and so it's essential to try out your node with input data.
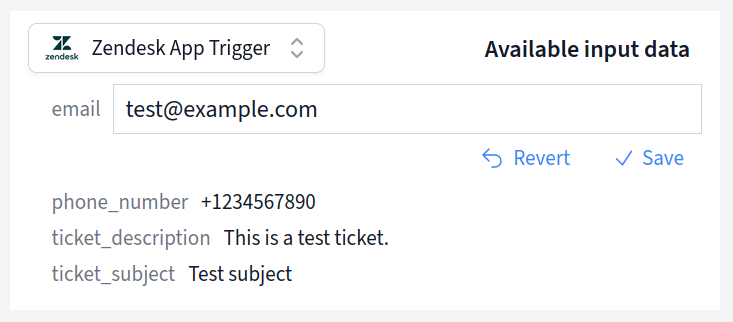
The Input data is displayed as individual editable fields in the Preview box. When you have a previous node in your flow, the output data from that node automatically appears as the test input data for the current node. You can edit each field value individually to test different scenarios.

If this is the first node in your flow (connected directly to a trigger), the test input data will be populated with the data captured from your trigger.
To dynamically insert data in your request body or URL, you can use placeholders. They beginn with a dollar-sign ($) just like variables in many programming languages.
The input data to this node are stored in the $data variable. Let's say your
node receives the following data:
{
  "id": 123,
  "email": "alice@example.com",
  "name": "Alice"
}
And let's say you want to use the ID parameter in the URL. You could have the ID inserted dynamically like this:
https://example.com/api/customer/$data.id
Or you want to submit a dynamic request body with the email address and the name. Then the request body would look like this:
{
  "email": $data.email,
  "name": $data.name
}
To see the effects of your query, hit the Run button. This will run the node (but only this single node) for real. So if you're updating data via a real API, your real data will update.
In the test run it will replace all placeholders with the data you've defined in Input data.
After the request finishes, you'll see the outputs in the Output section. This is whatever the API returns and you can work with this data in the next node.
If this is already the final node in the Flow, this output will be returned as the Flow's results.
To rename the node, either click on Rename next to the title, or double-click on the title itself. Then enter the new name and click on Save or hit Enter on your keyboard. To revert to the old name, hit the Escape key.
Above the Input box you find the quick navigation through the Flow. Use this to get to the previous or the next node.