The first step in querying your PostgreSQL database is to connect FactBranch to your PostgreSQL instance. You do this by creating a PostgreSQL Data Source in FactBranch.
Once you've entered your credentials in the authentication, they are stored on FactBranch's servers, encrypted-at-rest and the password will never be shown again anywhere in your FactBranch account.
You can, however, use the authentication in your nodes. This allows you to save the credentials once and then re-use it in several nodes. You can even let another team member create nodes and use the data source without them seeing the credentials.
In this article you'll learn:
We recommend creating a dedicated user for FactBranch with only the permissions it needs to run your queries. Typically this means giving read-only access on the tables you will query.
This is a basic example of how to create an appropriate user in your PostgreSQL database. Use this as a starting point depending on your own requirements.
Create a database user for FactBranch. Replace all values surrounded by <...>
with your own values.
CREATE USER factbranch WITH PASSWORD '<PASSWORD>';
Grant the user read-only access to the databases and tables you want to query:
-- Grant connection access to the database
GRANT CONNECT ON DATABASE <your_database> TO factbranch;

-- Grant usage on the schema
GRANT USAGE ON SCHEMA <your_schema> TO factbranch;

-- Grant read access to all tables in the schema
GRANT SELECT ON ALL TABLES IN SCHEMA <your_schema> TO factbranch;

-- Grant read access to future tables (optional)
ALTER DEFAULT PRIVILEGES IN SCHEMA <your_schema>
    GRANT SELECT ON TABLES TO factbranch;
If you're using Amazon RDS PostgreSQL, you can create the user using the same SQL commands above. Make sure your RDS security group allows connections from FactBranch's static IP address.
Amazon Aurora PostgreSQL works the same way as RDS PostgreSQL. Use the cluster endpoint as your host address.
To create a PostgreSQL authentication in FactBranch, click on Add data source in your Data Sources dashboard, then select PostgreSQL. You'll be forwarded to the credentials form.
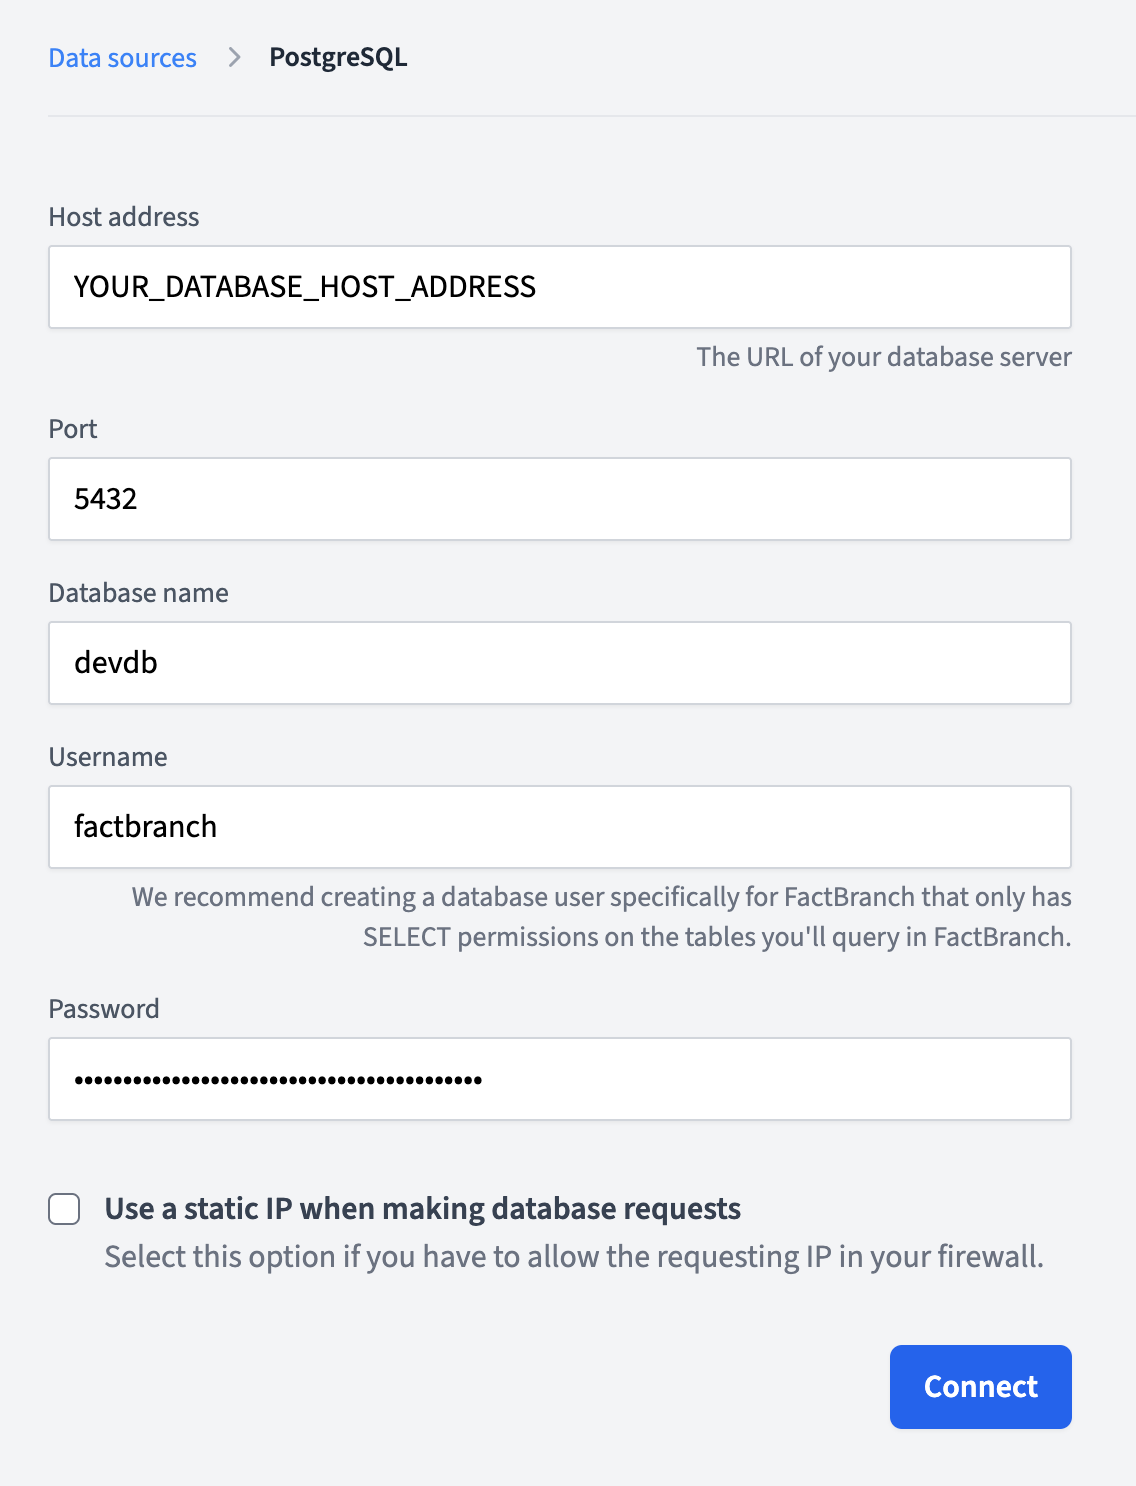
your-instance.region.rds.amazonaws.comfactbranch.
Once you've filled out everything, click Connect. FactBranch will test the credentials you've entered by attempting to connect to your database. If it was successful, you'll be forwarded to the list of data sources and you'll see your newly created PostgreSQL authentication in the list.
You can now use this authentication in a PostgreSQL node to run SQL queries in your PostgreSQL database.
To rename the data source, either click on Rename next to the title, or double-click on the title itself. Then enter the new name and click on Save or hit Enter on your keyboard. To revert to the old name, hit the Escape key.
First create a PostgreSQL node in one of your Flows. Edit the node by clicking Edit next to the node in the Flow Editor. Select the Authentication tab on the left side of the screen. Then click on Select an authentication... - or on change... if that node already has an authentication associated. Select the authentication you'd like to use and from now on this node will use for all its requests the credentials you've stored in the authentication.
If you get a "connection refused" error, check that:
- Your PostgreSQL server is running and accessible
- The host address and port are correct
- Your firewall allows connections from FactBranch's static IP address
- The pg_hba.conf file allows connections from external hosts
If you get an "access denied" error, verify that: - The username and password are correct - The user has been granted CONNECT privileges on the database - The user has been granted USAGE privileges on the schema - The user has been granted SELECT privileges on the tables
FactBranch connects using SSL by default for security. PostgreSQL supports SSL connections out of the box in most configurations. If you encounter SSL issues, check your PostgreSQL SSL configuration.
Make sure your pg_hba.conf file allows connections from FactBranch's IP address.
You may need to add a line like:
host <your_database> factbranch <factbranch_ip>/32 md5
Replace <your_database> with your database name and <factbranch_ip> with
FactBranch's static IP address shown in the authentication form.