Prerequisites
In this article we're looking at:
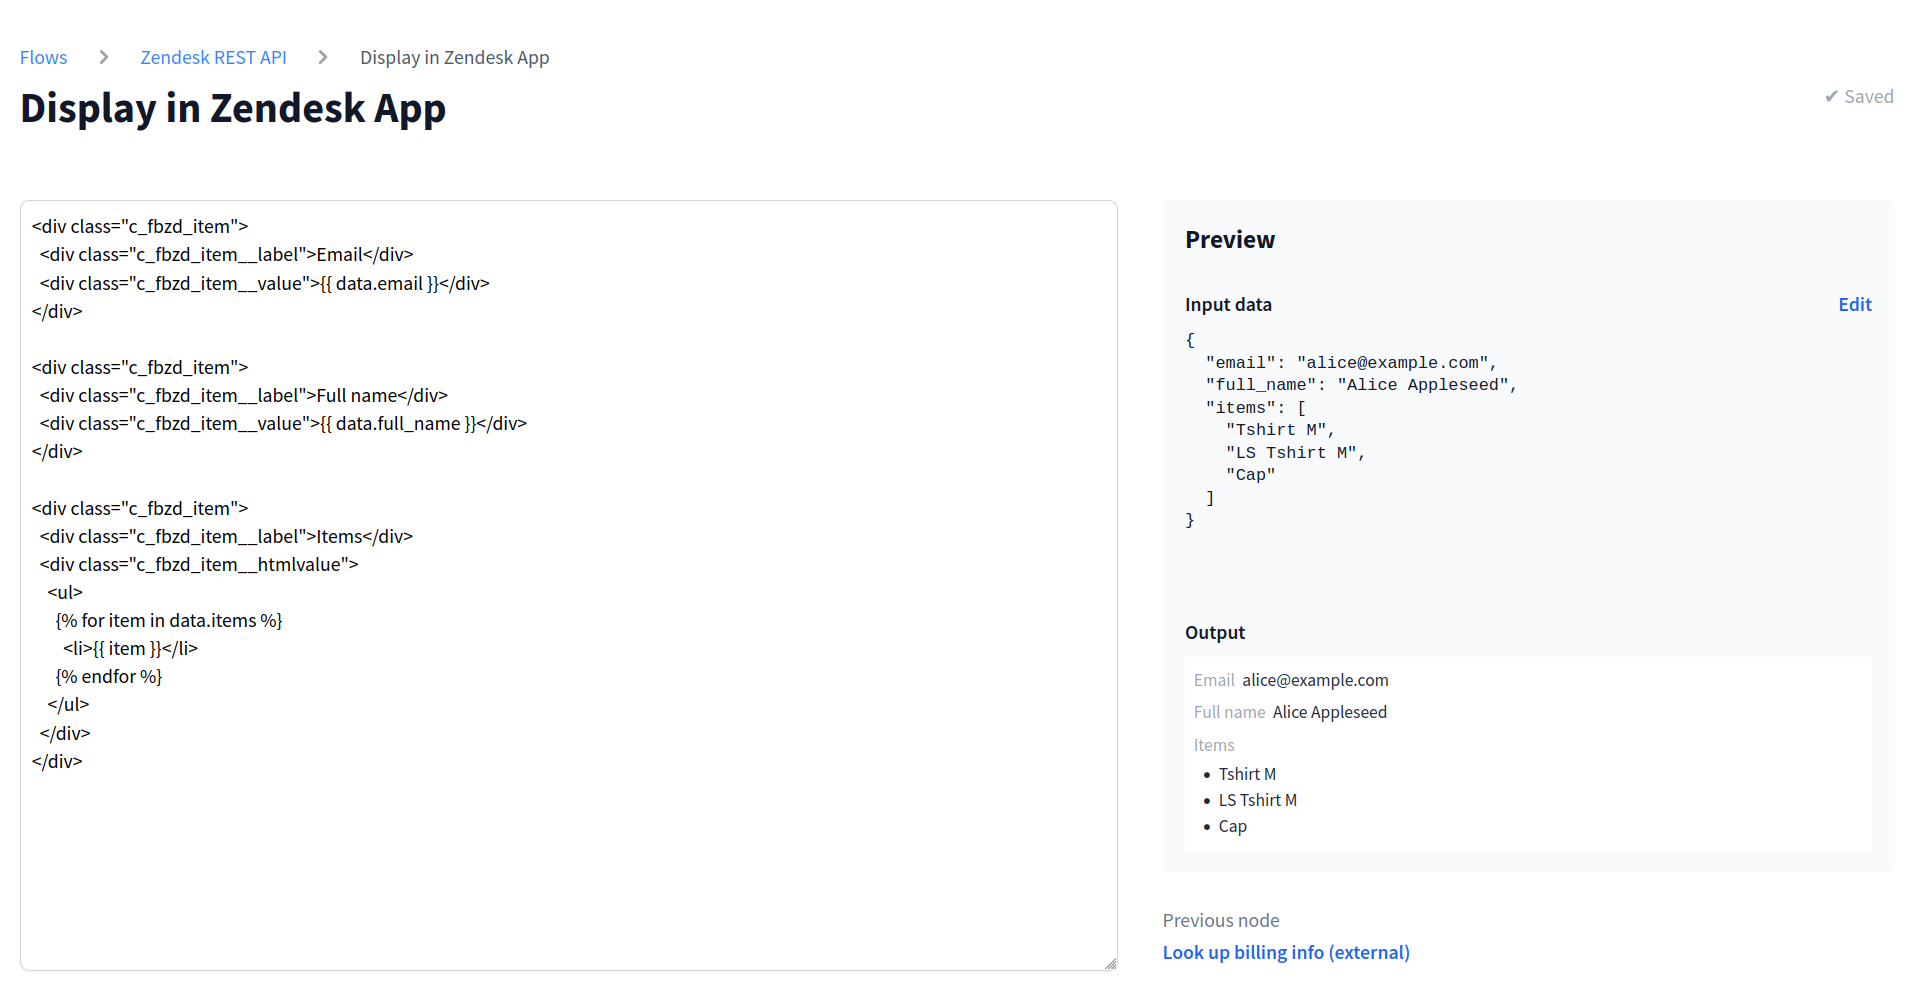
Like most nodes, the Zendesk App Display node is divided into two main areas. The larger area on the left is for creating the template itself and the Preview box on the right shows you a preview of the template in Zendesk Support, in Zendesk Chat or in Zendesk Sell.
Most nodes use dynamic data somewhere (more on using placeholders for dynamic data in the using placeholders section below) and so it's essential to try out your node with input data.
The Input data is displayed as individual editable fields in the Preview box. When you have a previous node in your flow, the output data from that node automatically appears as the test input data for the current node. You can edit each field value individually to test different scenarios.
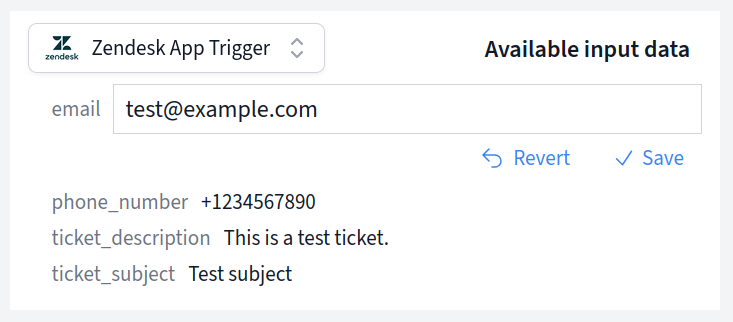
If this is the first node in your flow (connected directly to a trigger), the test input data will be populated with the data captured from your trigger.
When the template editor on the left is completely empty, the button Generate template" will appear below the Input data* on the right.
Clicking this button will generate a template from your test input data. This works magically, when your input data is either a simple object that only contains properties or an array of such objects. If your input data is nested or complicated in another way, you might have to write your own HTML code.
But before we look into building templates, let's explore how to include dynamic data in your templates by using placeholders.
To dynamically insert data in your template, you can use placeholders. In HTML
templates we use a different syntax to other nodes: Variables don't have a $
prefix and you can output their values by surrounding a variable with double
curly brackets:
{{ data }}
Like in all nodes, the input data to this node are stored in the variable data
and you access the values themselves using the dot property syntax. Let's say
your node receives the following data from the previous node or the trigger:
{
  "id": 123,
  "email": "alice@example.com",
  "full_name": "Alice Appleseed",
  "name": {
    "first": "Alice",
    "last": "Appleseed"
  }
}
To dynamically insert the email address in your template, write:
{{ data.email }}
Or to output the first name:
{{ data.name.first }}
If auto-generating a template didn't give you the desired results, you can adapt the template or you might prefer to write your own template altogether.
There are a few CSS classes that you can use to style your template in the "standard" FactBranch style.
For a standard label-value output, use the following HTML code (for example to
display the property full_name from your test input data):
<div class="c_fbzd_item">
  <div class="c_fbzd_item__label">Full name</div>
  <div class="c_fbzd_item__value">{{ data.full_name }}</div>
</div>
The template is normal HTML code, except that you can't use <script>,
<html> or <body> tags. Your template will be included inside an HTML
document, so there is no need for a surrounding <body> tag.
Dynamic parts are surrounded by curly brackets. But there are two variants:
{{ data.name }}
Double curly brackets will output the results of whatever you put inside the
curly brackets. Here it will output the value of data.name. You could also use
simple expressions like {{ 1 + 1 }}, which will output 2 of course.
{% ... %}
This syntax is for control structures like if or for.
If you are familiar with Liquid or Jinja2, you will recognize this templating syntax and feel at home.
The FactBranch app is often displayed in a sidebar and so space is limited. But what if you'd like to display lots of data? The collapsible item is our solution to this problem.
This makes organizing the view easy and is perfect for displaying a list of most recent orders or all transactions of your customers.
The collapsible is a single item that displays multiple result fields at once. Your input data has to reflect that. You can either supply an object or an array of objects to the collapsible.
Let's say your input data to the Zendesk App Display node look like this:
{
  "customer_name": "Alice Example",
  "orders": [
    {"id": "#123456", "summary": "9 items", "status": "returned", "total": "117.93$"},
    {"id": "#234567", "summary": "6 items", "status": "shipped", "total": "177.27$"},
    {"id": "#345678", "summary": "1 item", "status": "delivered", "total": "29.99$"},
    {"id": "#456789", "summary": "12 items", "status": "delivered", "total": "231.14$"}
  ]
}
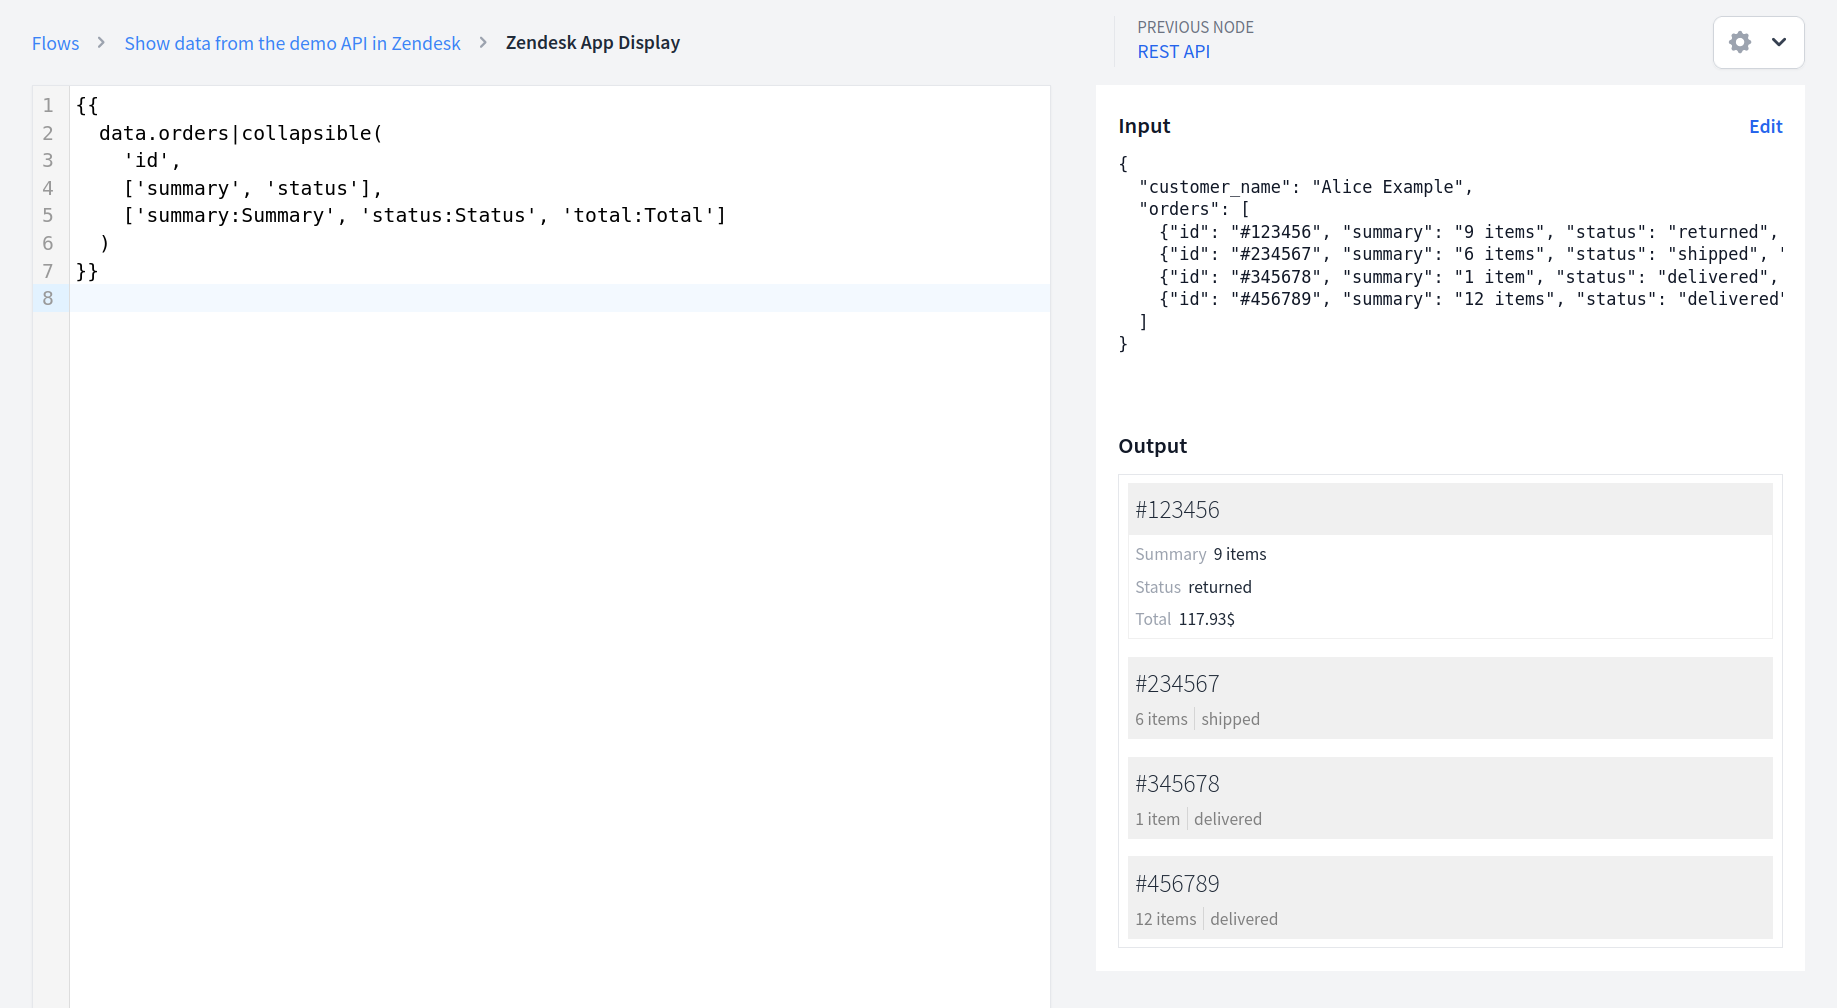
With this data structure we can generate collapsibles for every order using the following template code:
{{
  data.orders|collapsible(
    'id',
    ['summary', 'status'],
    ['summary:Summary', 'status:Status', 'total:Total']
  )
}}
Let's take this apart line-by-line:
First, with data.orders|collapsible you tell FactBranch that you
want to work with the list of orders from your input data and apply a
filter called collapsible. This filter actually generates the gray boxes
that expand when clicked.
The collapsible-filter takes three arguments: the property to use as the
title, the properties to show when collapsed and the properties to show when
expanded.
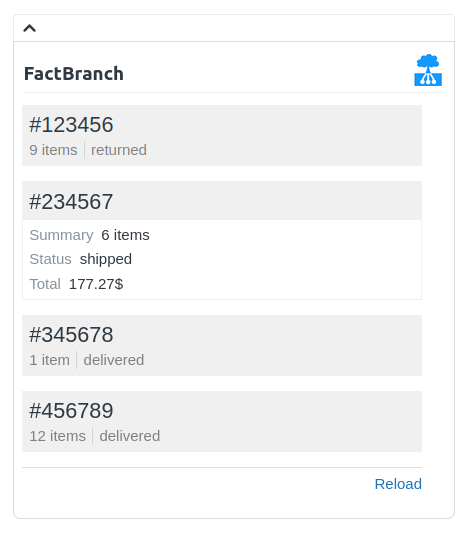
The properties for the expanded view have an optional syntax that we're using:
'property_id:Custom label to display'. This way you tell FactBranch which
field to use and after the colon which label to display.
Here is the complete example in FactBranch:
And in Zendesk it will look like this:
You can also use for-loops in your template. Because the for itself is a
statement, surround it with {% %}. First, here is test input data containing
an array:
{
  "customers": [
    {"name": "Alice", "email": "alice@example.com"},
    {"name": "Bob", "email": "bob@example.com"},
    {"name": "Carla", "email": "carla@example.com"},
    {"name": "Dan", "email": "dan@example.com"}
  ]
}
To display these email addresses in a list, use the following snippet in your template:
<ul>
  {% for item in data.customers %}
    <li>{{ item.email }}</li>
  {% endfor %}
</ul>
To build a nice and compact table we can use a for loop and a CSS class
provided by FactBranch:
<table class="c_fbzd_table">
  <tr>
    <th>Name</th>
    <th>Email</th>
  </tr>
  {% for row in data.customers %}
    <tr>
      <td>{{ row.name }}</td>
      <td>{{ row.email }}</td>
    </tr>
  {% endfor %}
</table>
To display different content depending on the data we receive, we can use an
if/elif/else statement. elif is short for "else if" and alows you to add
more conditions if the previous conditions are not met. For example to display
an error message if there was an error or a nice message if the customers array
was empty we could simply do this:
{% if data.customers %}
  ... list the customers here ...
{% elif data.error_message %}
  <p style="color: crimson;">{{ data.error_message }}</p>
{% else %}
  <p>No customer found</p>
{% endif %}
The if first checks if the customers array contains entries - if not, it will
check if there is an error_message - and if not, it will display the notice
that no customers were found.
To rename the node, either click on Rename next to the title, or double-click on the title itself. Then enter the new name and click on Save or hit Enter on your keyboard. To revert to the old name, hit the Escape key.
Above the Input box you find the quick navigation through the Flow. Use this to get to the previous or the next node.